How to Use iCloud Private Relay
Posted on
by
Kirk McElhearn

With the next versions of macOS, iOS, and iPadOS, due to be released in the fall, Apple is introducing iCloud Private Relay, a new privacy feature designed to mask your devices’ IP addresses. This feature will be available as part of iCloud+, which is the new name for iCloud accounts where uses pay for additional storage.
Here’s how iCloud Private Relay works.
Who can use iCloud Private Relay?
iCloud Private Relay is part of iCloud+, Apple’s new service that will be available to the public in the fall, when Apple releases macOS Monterey and iOS/iPadOS 15. To use iCloud Private Relay you’ll have to have a paid iCloud account. If you are already paying for increased storage, you’ll automatically get iCloud+ features, which include iCloud Private Relay and HomeKit Secure Video.
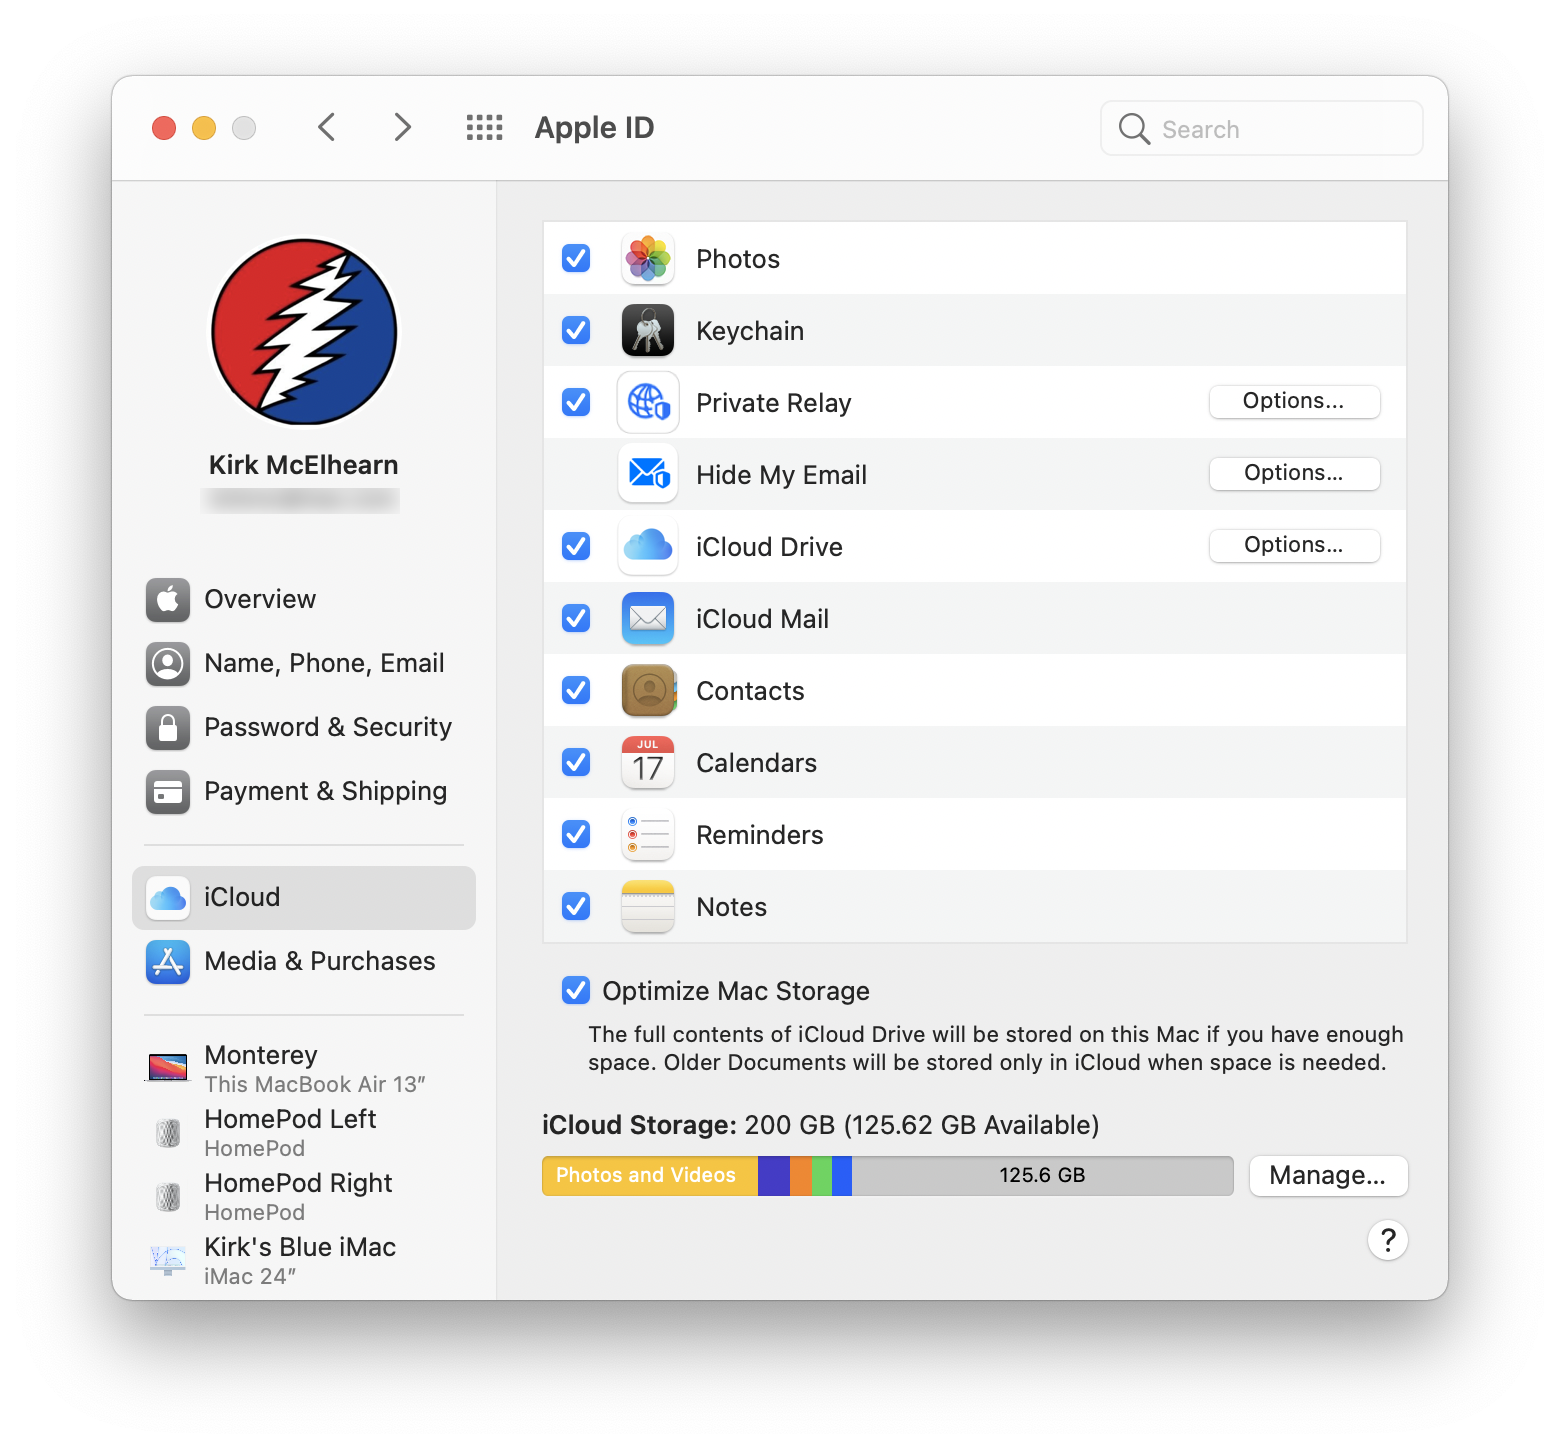
By default, when you create an Apple ID, you get 5 GB storage, along with other features like iCloud email. But most users need more than 5 GB just to store their photos, not to mention backing up their iPhones and iPads. So for $1 a month, you can get additional storage, up to 50 GB, with two other storage tiers available: you can get 200 GB for $3 a month, and 2 TB for $10 a month. To increase this storage on a Mac, go to System Preferences > Apple ID > iCloud, then, at the bottom of the pane, in the iCloud Storage section, click Manage, then Buy More Storage. On iOS or iPadOS, go to Settings, tap your name, then iCloud > Manage Storage, then Buy More Storage or Change Storage Plan to change the amount of storage you have.
iCloud Private Relay hides your IP address, which can be used to fingerprint your device and create a profile of you and your activity. It does this by using two proxies – internet servers that translate your IP address – and neither of these proxies knows both your IP address and the site your device is accessing.

Apple runs the first proxy, which assigns an anonymous IP address to your device, which indicates your region, but not your precise location. This proxy passes your request onto the second proxy, run by content providers, such as Akamai, Fastly, and Cloudflare. The second proxy decrypts the web address you want to access, sends the request to the site, then sends data back through the first proxy to you. Neither Apple nor the second proxy have all the information about your IP address and the site you’re accessing, protecting your privacy.
Private Relay will apply to all web browsing in Safari, all DNS name resolution queries from Apple devices, and a small subset of traffic from apps, if app developers have enabled this feature.
Note that iCloud Private Relay is not available in China, Belarus, Colombia, Egypt, Kazakhstan, Saudi Arabia, South Africa, Turkmenistan, Uganda, and the Philippines, because of “regulatory reasons.”
How to use iCloud Private Relay
With the forthcoming versions of macOS, iOS, and iPadOS currently in beta, some of the following may change.
To access iCloud Private Relay settings on a Mac, go to System Preferences, then click Apple ID.

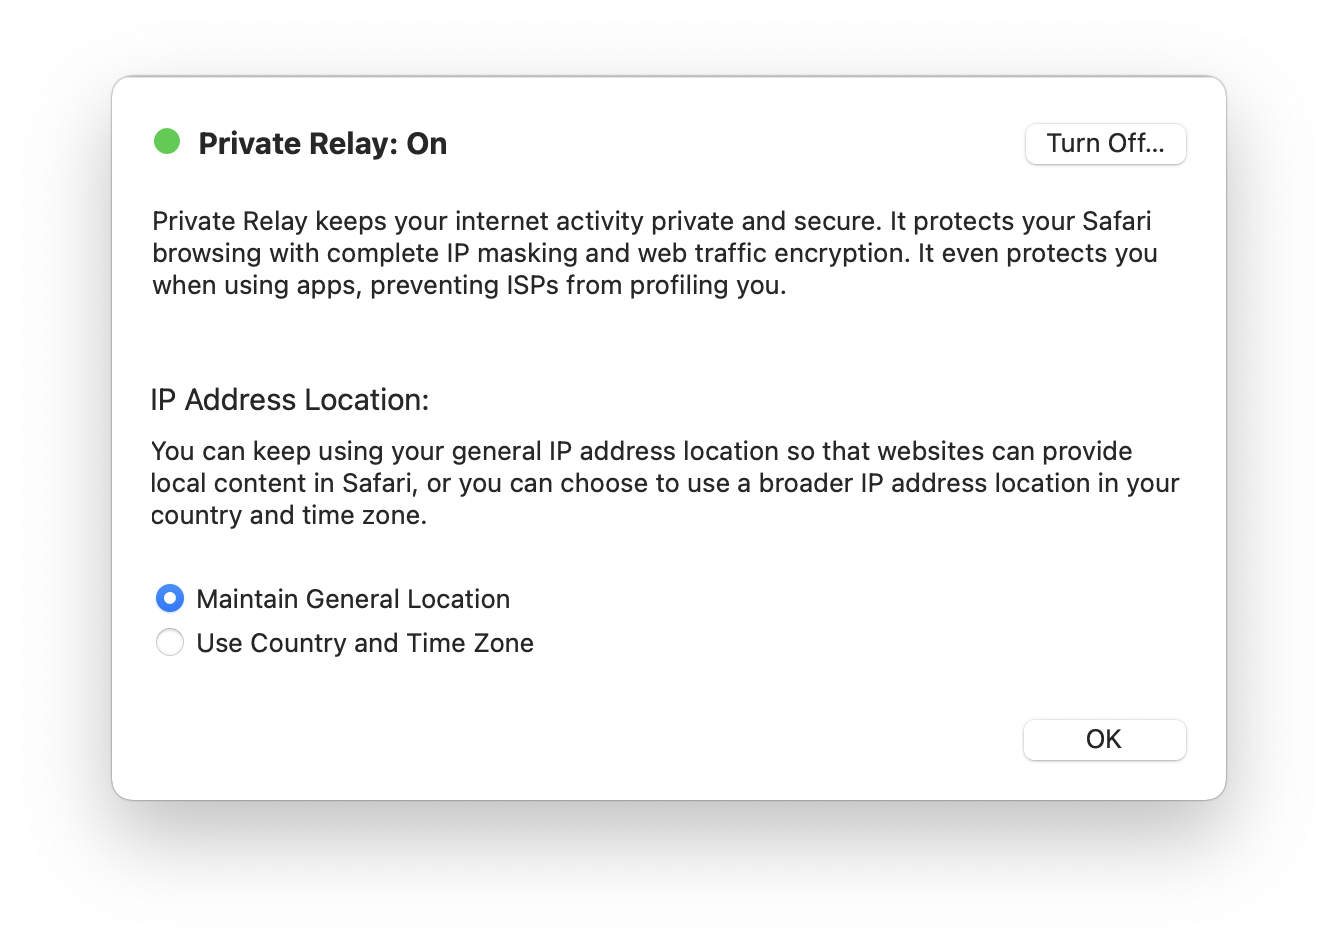
Click the box next to iCloud Private Relay, then click Options. You can enable or disable iCloud Private Relay here, and you can choose from two location settings. Maintain General Location tells servers approximately where you are, but not precisely; you’ll want this setting if you’re googling where to get pizza. If you choose Use Country and Time Zone, then your location will be totally obfuscated, but your country will be provided to servers. This can be necessary to access geo-restricted content, but if you want more localized information, you’ll have to search in Maps or on websites for your location.

On iOS and iPadOS, you’ll find these settings by going to the Settings app, tapping your name at the top, then tapping iCloud, then Private Relay.
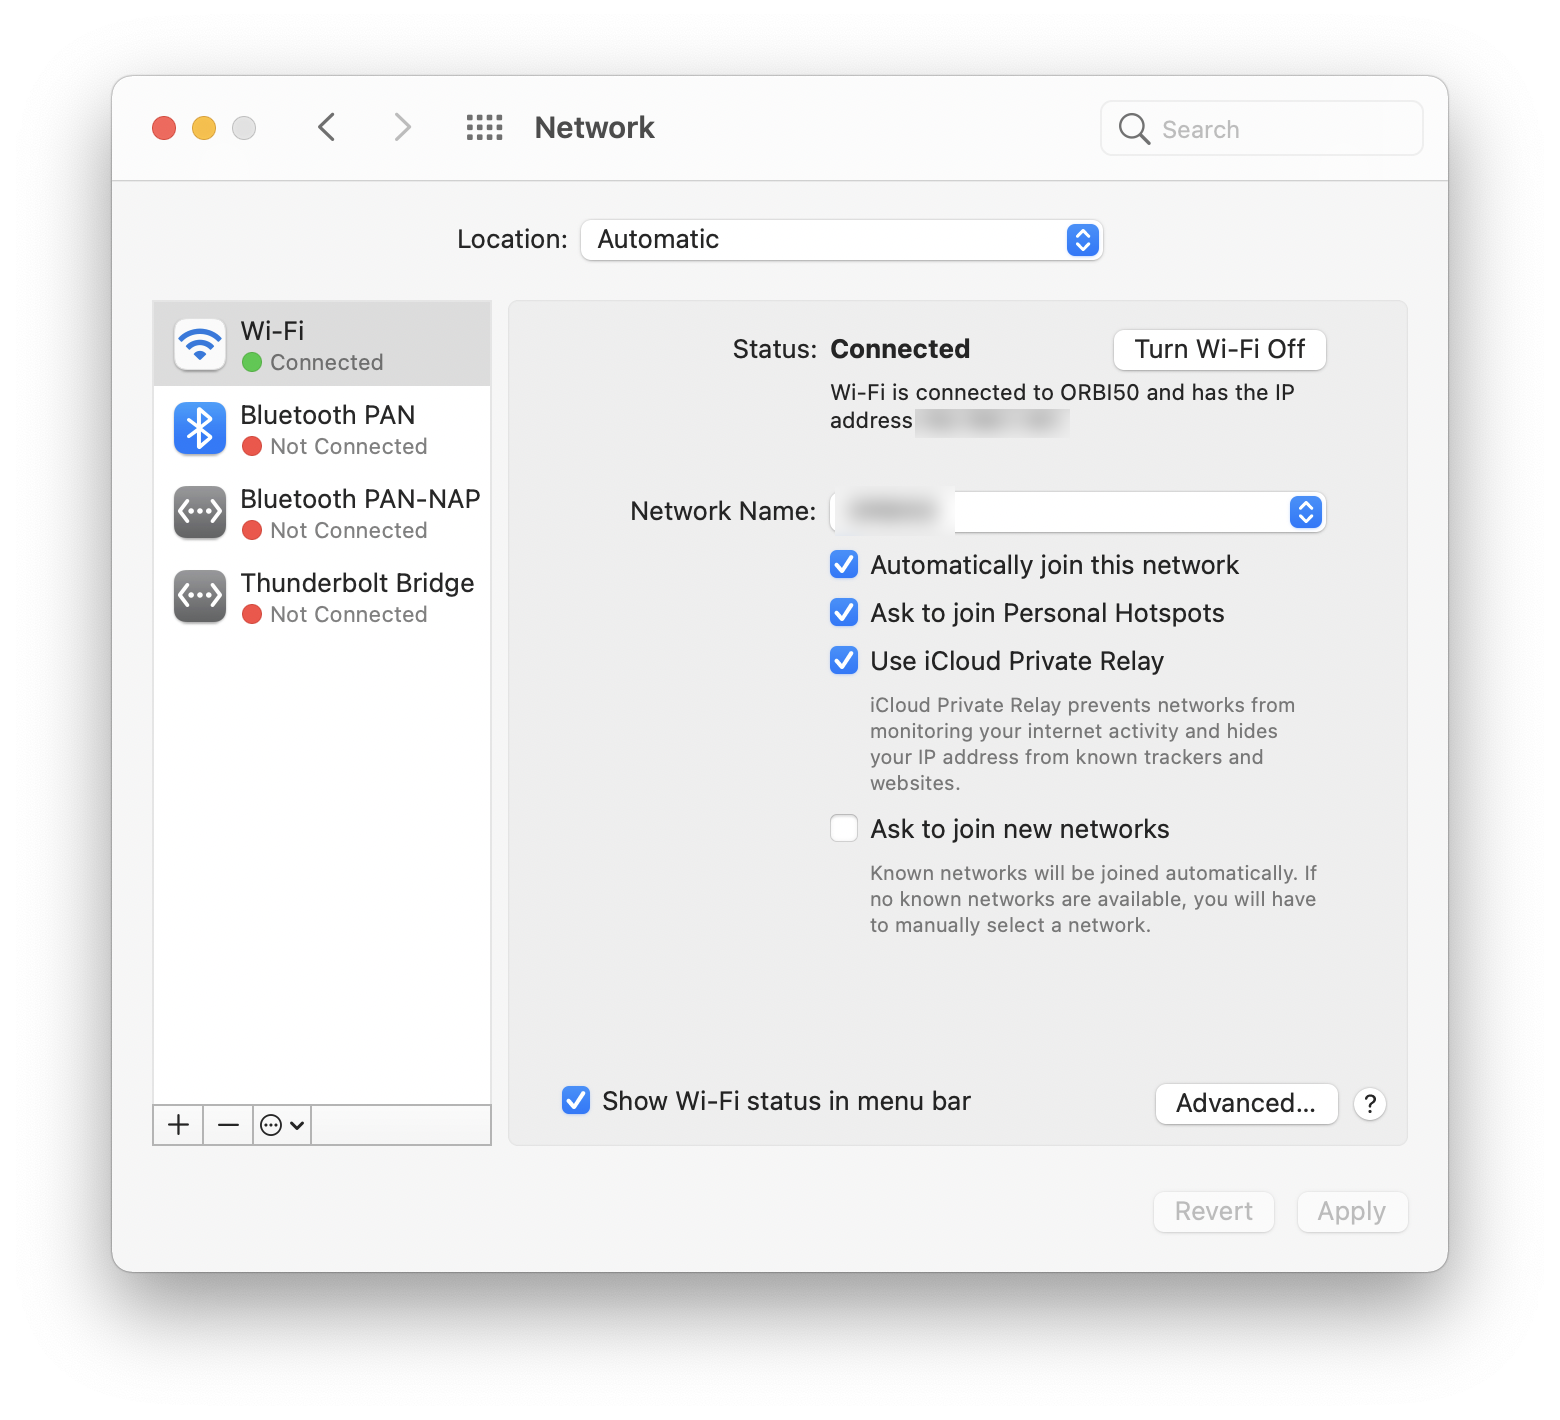
Interestingly, there is another location where you’ll find iCloud Private Relay settings. If you go to System Preferences > Network, and select your active network, you’ll seen an option here to enable or disable iCloud Private Relay.

These settings seem to be independent of each other, and it’s not clear what the option in the Network preferences does. This setting does not appear on iOS/iPadOS in the Wi-Fi network settings.
Is iCloud Private Relay a VPN?
While iCloud Private Relay includes some features of a VPN, such as proxies for anonymity, it is very different from a VPN, and should not be considered to offer the same privacy protection.
iCloud Private Relay only works with Safari, DNS queries, and some apps, whereas a VPN protects traffic on all apps and services on your device. It doesn’t offer the same privacy as a good VPN, and doesn’t allow you to choose a location from which your device appears to be connection.
This article, Is Apple’s iCloud Private Relay a VPN? Not Even Close—Here’s Why, goes into detail about the differences between iCloud Private Relay and a VPN, and why the latter is much more secure.
Is Apple’s iCloud Private Relay a VPN? Not Even Close—Here’s Why
iCloud Private Relay is an excellent feature to protect your privacy, and you should consider using it as soon as it is available.
How can I learn more?
 Each week on the Intego Mac Podcast, Intego’s Mac security experts discuss the latest Apple news, security and privacy stories, and offer practical advice on getting the most out of your Apple devices. Be sure to follow the podcast to make sure you don’t miss any episodes.
You can also subscribe to our e-mail newsletter and keep an eye here on Mac Security Blog for the latest Apple security and privacy news. And don’t forget to follow Intego on your favorite social media channels: Facebook, Instagram, Twitter, and YouTube.