How to use Apple Intelligence Writing Tools to express yourself perfectly
Posted on
by
Kirk McElhearn
Apple Intelligence features began trickling out with the introduction of iOS 18.1, iPadOS 18.1, and macOS Sequoia 15.1. Apple Intelligence is constantly being iterated upon, and new features have continued to roll out over several months. The company will further build on this AI framework in the years to come.
Some of Apple’s AI features are extremely practical. The writing tools—which were part of the first salvo of Apple Intelligence features—can be useful to anyone who writes anything. Here’s an overview of how to use Apple Intelligence writing tools.
What are Apple Intelligence writing tools?
Apple Intelligence writing tools are a suite of tools that allow you to proofread, rewrite, summarize, and perform other actions on texts. This sort of writing assistant has been around for a while, and online grammar checkers offer these tools, as do other websites that provide AI tools for writers.
It’s important to note that Apple Intelligence writing tools are not generative AI—at least not in the typical sense. They cannot write a text for you based on a prompt. For example, there are many online services where you could say something such as, “Write a description of a sunset over a beach.” The site would write a paragraph or two, in a style that you might choose, which you might wish to insert into a piece of writing.
Apple’s tools are designed to improve, enhance, or reformat existing text. They can rewrite text in various registers, summarize text, create lists, and more.
These writing tools are available on all Macs with Apple silicon (M1/M2/M3/M4 processors), iPhone 15 Pro models, any iPhone 16 model, iPads with Apple’s M-series processors, and the iPad mini (A17 Pro, aka 7th generation). You’ll need to be running the latest macOS, iOS, or iPadOS version; the first compatible versions were Sequoia 15.1, 18.1, and 18.1, respectively.
It’s important to note that Apple Intelligence writing tools perform all of their operations on your device: on your Mac, iPhone, or iPad. None of your text is sent to any server—neither Apple’s nor anyone else’s. This is great for user privacy.
How to invoke Apple Intelligence writing tools
The steps below assuming that you’ve already opted into and enabled Apple Intelligence. It may be enabled automatically if you’re using the most recent OS version.
On a Mac
To use Apple Intelligence writing tools on Mac, select some text, then do one of the following:
- Click the blue icon that appears to the left of the text window; this isn’t always visible.

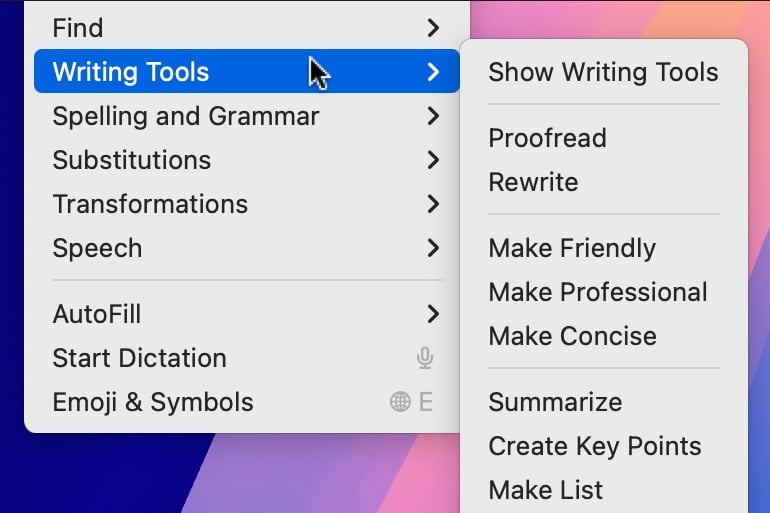
- Select some text, then choose Edit > Writing Tools, then choose either Show Writing tools to display the Writing Tools palette, or choose a specific tool from the submenu.
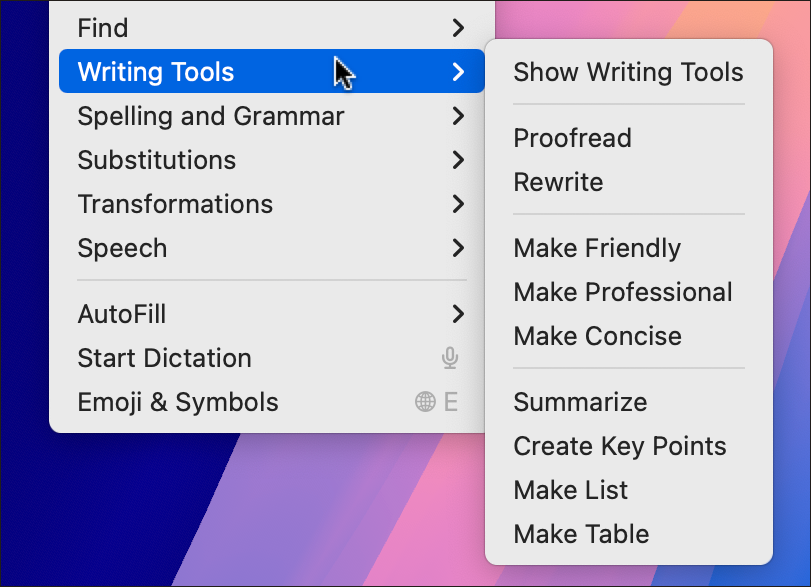
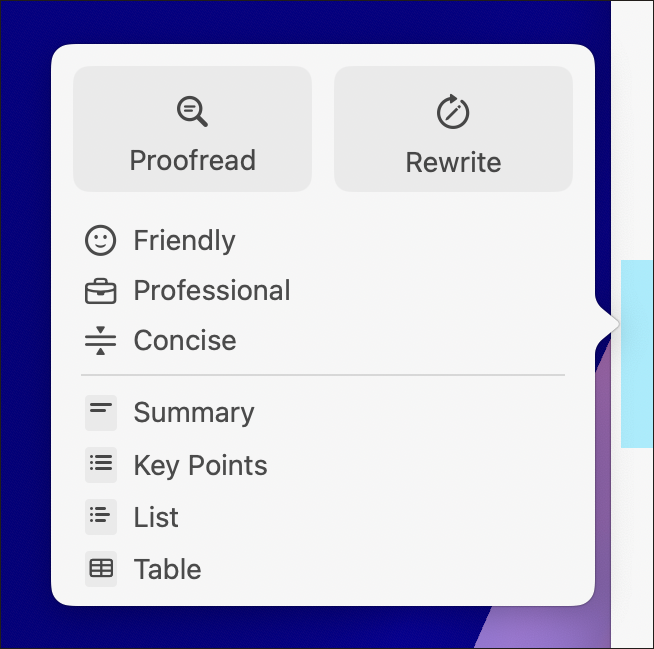
- Select some text, then right-click or Control-click and choose Writing Tools. A palette displays showing the tools available.
On an iPhone or iPad
To use Apple Intelligence writing tools on an iPhone or iPad, select some text, then tap the selection, and choose Writing Tools from the contextual menu that displays above the text. You may need to tap the > at the right of the menu to see this option.
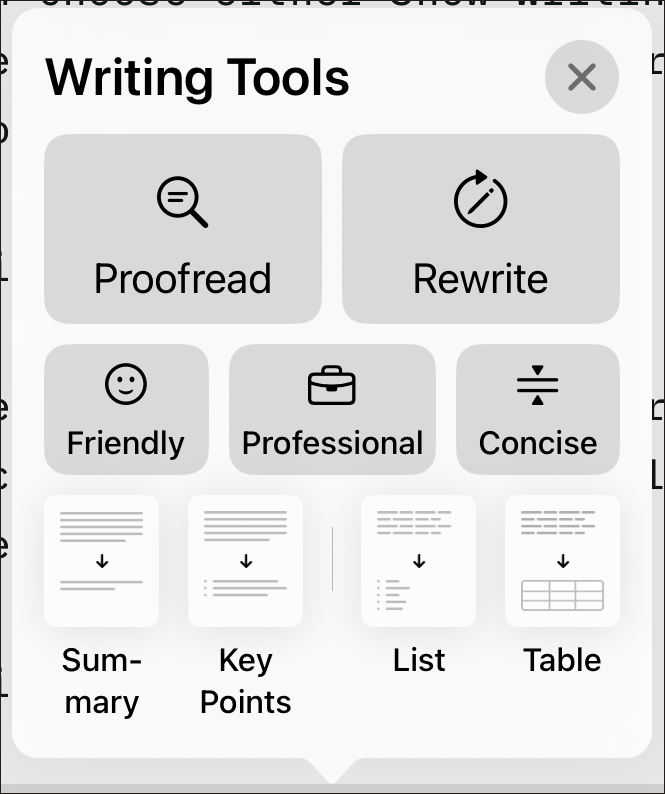
Regardless of whether you’re using a Mac, iPhone, or iPad, you have access to all of the same tools.
Use Apple Intelligence proofreading
One of the most powerful features in the Apple Intelligence toolbox is proofreading. This goes beyond the standard spelling check and grammar check built into macOS, iOS, and iPadOS. Select some text, invoke the writing tools, and then choose Proofread. This proofreading goes beyond merely correcting spelling and grammar; when writing an article about authors, I found that it corrected the name of the author Gabriel Garcia Marquez, adding accents that I hadn’t included.
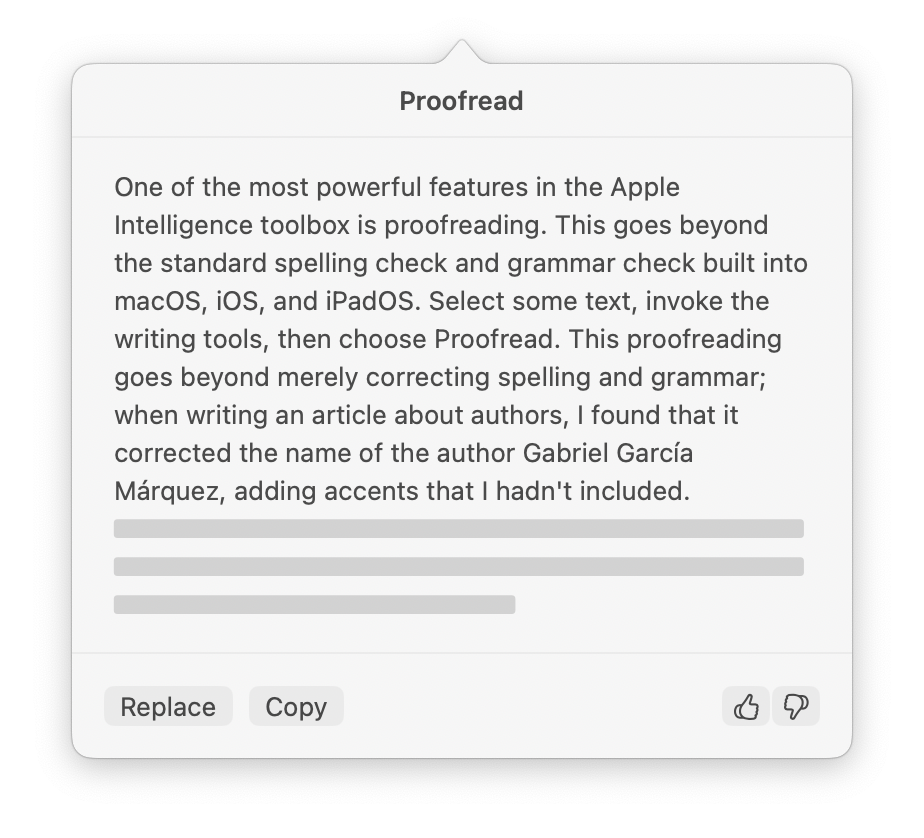
However, this tool is a blunt instrument. It shows you its corrected text, but it doesn’t allow you to accept or reject changes individually. This means that you can’t simply proofread an entire document and accept its changes; there may be changes that you don’t want, and that aren’t correct.
I find this tool to be useful at the paragraph level. When editing a text like an article, I select a paragraph at a time, invoke the proofreading tool, check the results, then decide whether I want to accept the changes, or perhaps just make one or two changes manually based on its suggestions.
Use Apple Intelligence rewriting
Apple Intelligence can rewrite selected texts in four ways. If you choose the Rewrite option, it seems to rewrite the text in the same tone and style, replacing some verbs and adjectives to match some sort of norm that isn’t clear. The three other options to make a text “friendly,” “professional,” or “concise,” allow you to modify the text according to these specific styles. Again, you have no input into the style you choose, and you may find that none of these options fit exactly what you want. But with rewriting, as with proofreading, you can choose to copy the text, paste it after your original text, and then manually make changes that you want rather than accepting the entire revision.
Here are four examples of Apple Intelligence rewriting a paragraph from earlier in this article.
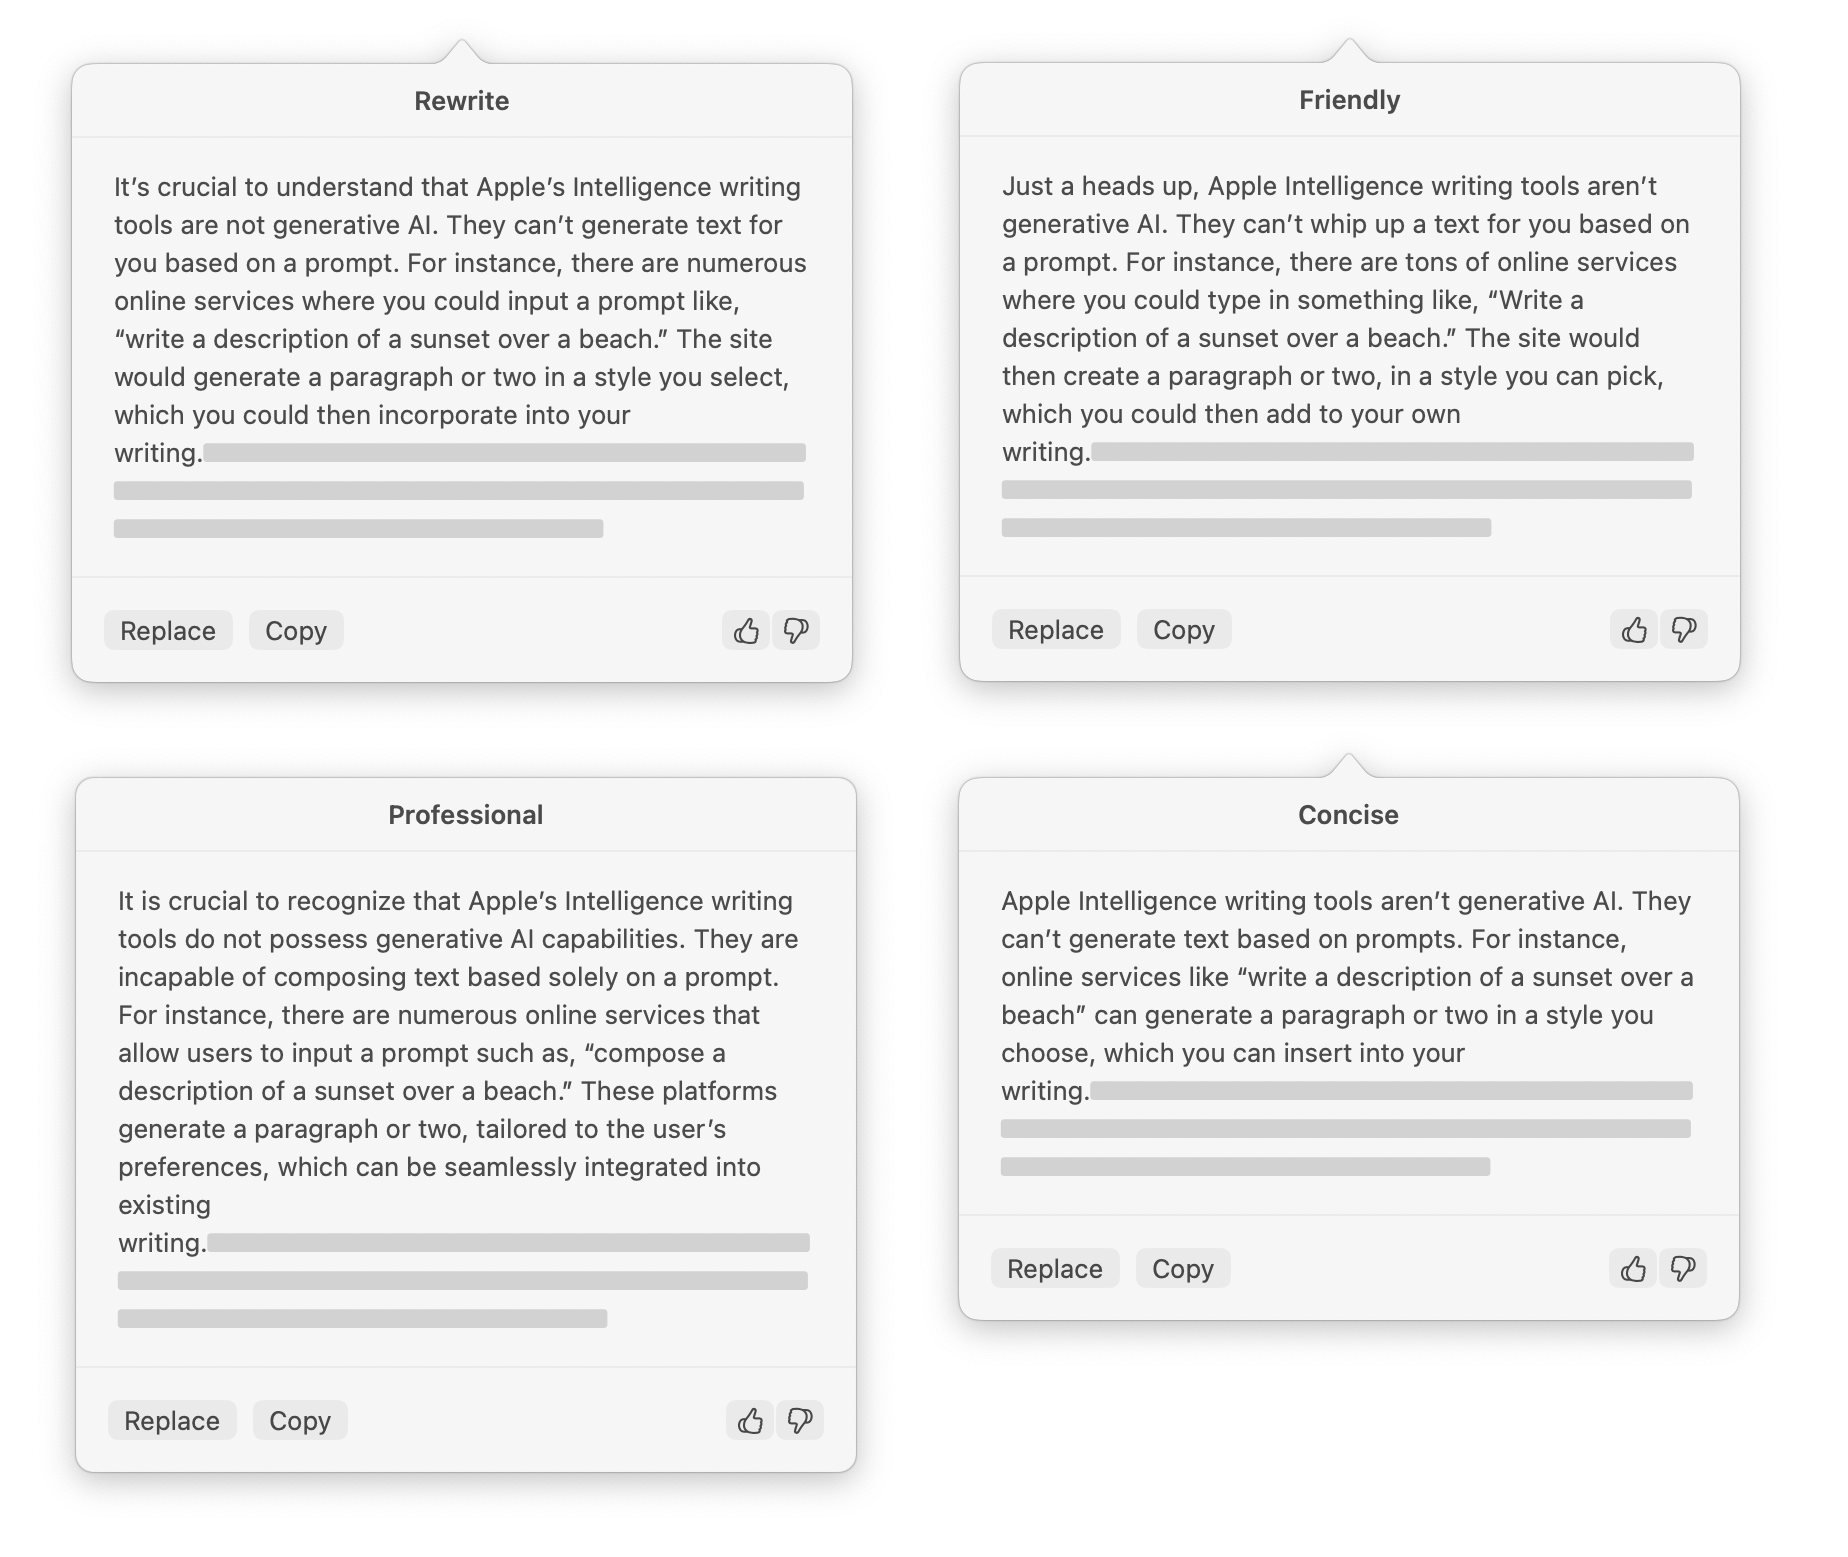
One use I’ve found for the rewrite tool is to offer suggestions when I’m not sure I’ve found the right verb or adjective. I use the tool a bit like a thesaurus; I sometimes have it rewrite one sentence to see if a suggestion is useful.
Use Apple Intelligence summaries, key points, lists, and tables
The four remaining features can summarize texts, break them down into key points, make lists of topics, and create tables. These features are useful when writing, but they can be just as useful when you’re reading a document or even a web page.
If you select all the text of a document and choose Writing Tools > Summarize you’ll get a brief summary which you could use at the beginning of a document, or in an email you’re sending to someone to tell them about the document, or just for yourself, so you know what the document is about.
Apple Mail has a similar Summarize option for emails. This can be a time-saver when you’re scanning an overflowing inbox to determine which emails to read.
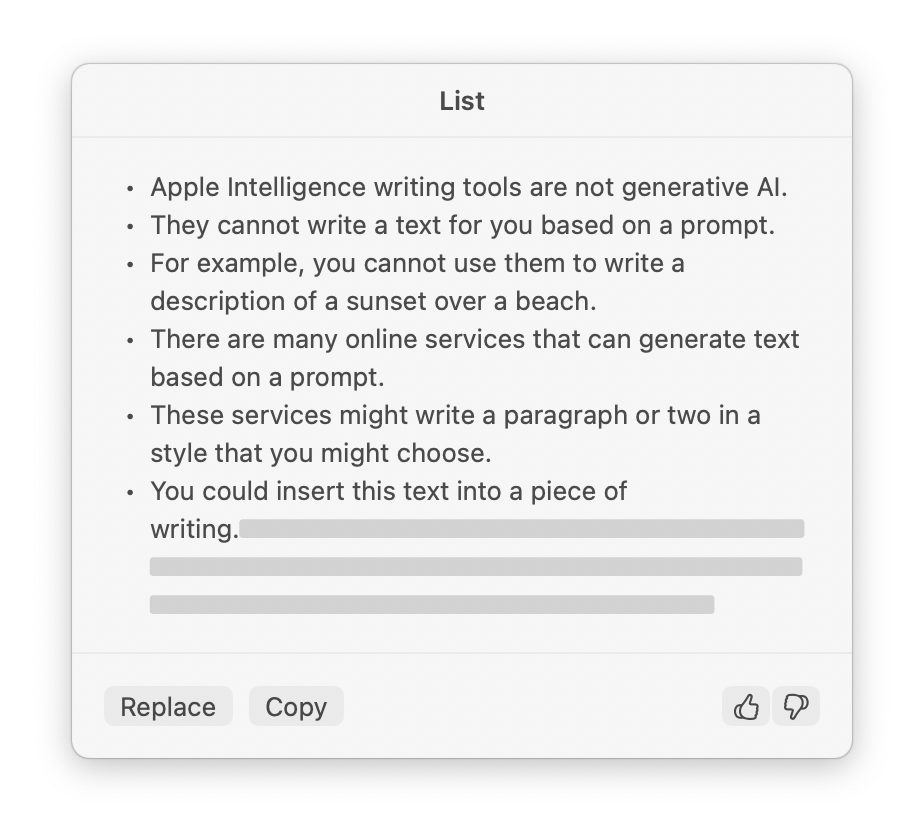
Using the Key Points and List features can also help you get an overview of documents. The Table feature can create tables from documents that contain numerical values and prices.
These Apple Intelligence writing tools are very powerful but should be used with caution. While they don’t create the type of “hallucinations” that generative AI tools create, they can alter texts when rewriting. For instance, they might remove contextual information, making it hard to fully understand the output text. As mentioned above, you should never accept Apple’s proofreading suggestions without reviewing them carefully. Rather, use them as a point of reference, and compare them to your original texts.
How can I learn more?
 Each week on the Intego Mac Podcast, Intego’s Mac security experts discuss the latest Apple news, including security and privacy stories, and offer practical advice on getting the most out of your Apple devices. Be sure to follow the podcast to make sure you don’t miss any episodes.
You can also subscribe to our e-mail newsletter and keep an eye here on The Mac Security Blog for the latest Apple security and privacy news. And don’t forget to follow Intego on your favorite social media channels: ![]()
![]()
![]()
![]()
![]()
![]()
![]()