How to Use Accessibility Features on Apple iOS Devices
Posted on
by
Kirk McElhearn
On iOS, as on the Mac, Apple offers a wide range of accessibility features to make the devices easier to read, hear, and work with for people with limitations. While many of these features are useful to people with limitations, some can make using an iOS device better for everyone. Here are a few accessibility features that you might want to try out.
On your iPhone or iPad, go to the Settings app, then General > Accessibility. You’ll see there are dozens of options, grouped in categories named Vision, Interaction, Hearing, Media, and Learning. (Note that different devices will show different settings in some of these categories, depending on there hardware capabilities.)

Vision settings
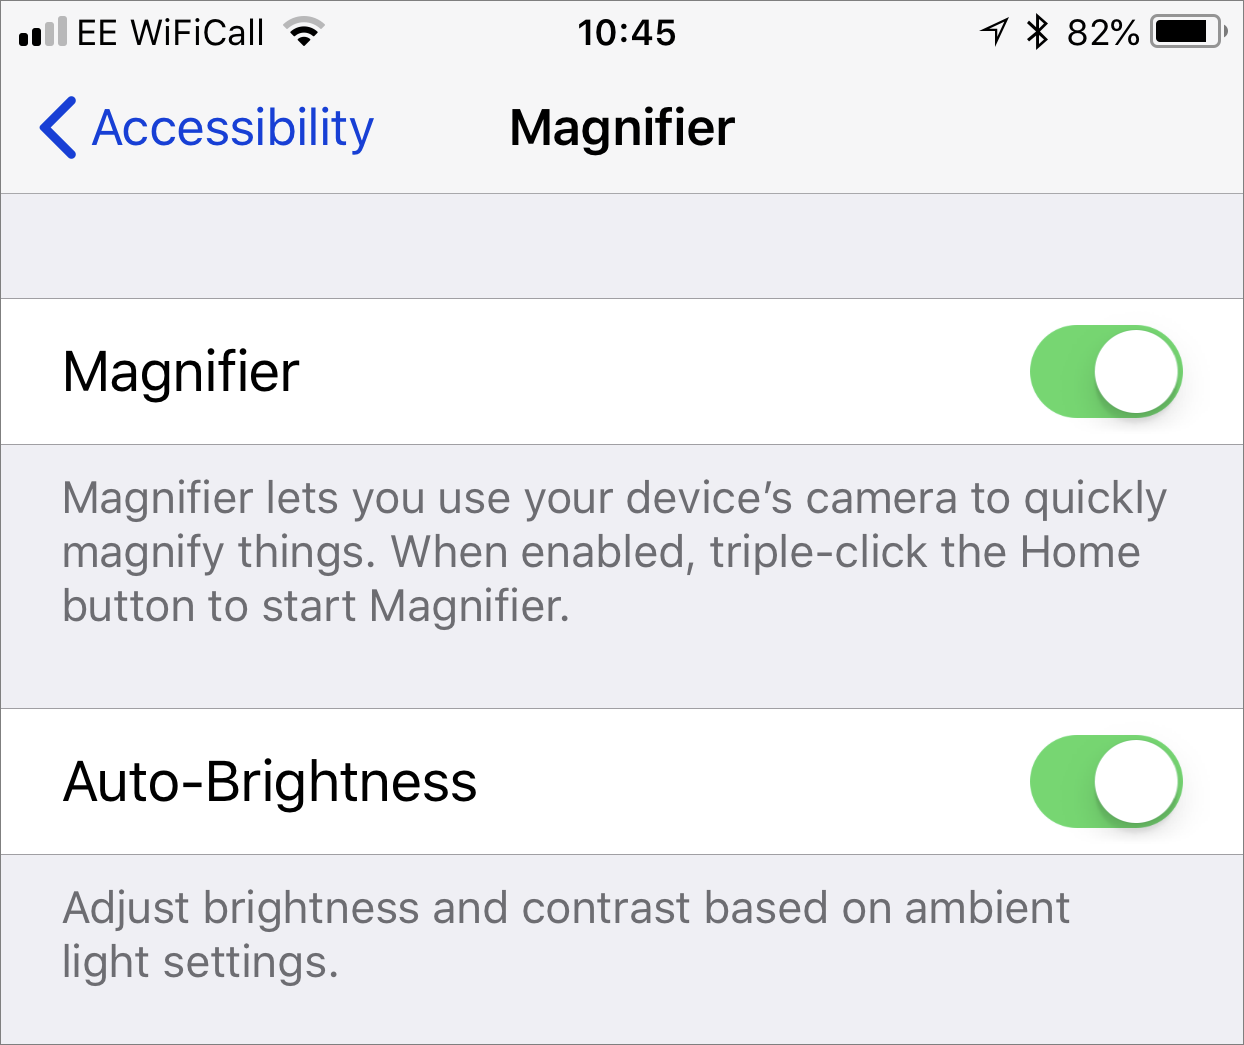
There are lots of vision settings, and some can be very useful. The Magnifier is one of the most practical such settings. Magnifier is new in iOS 11, and it lets you get a close look at anything. (I often use it to read labels on food packages.) If you turn this on, you can press the home button three times to activate it.
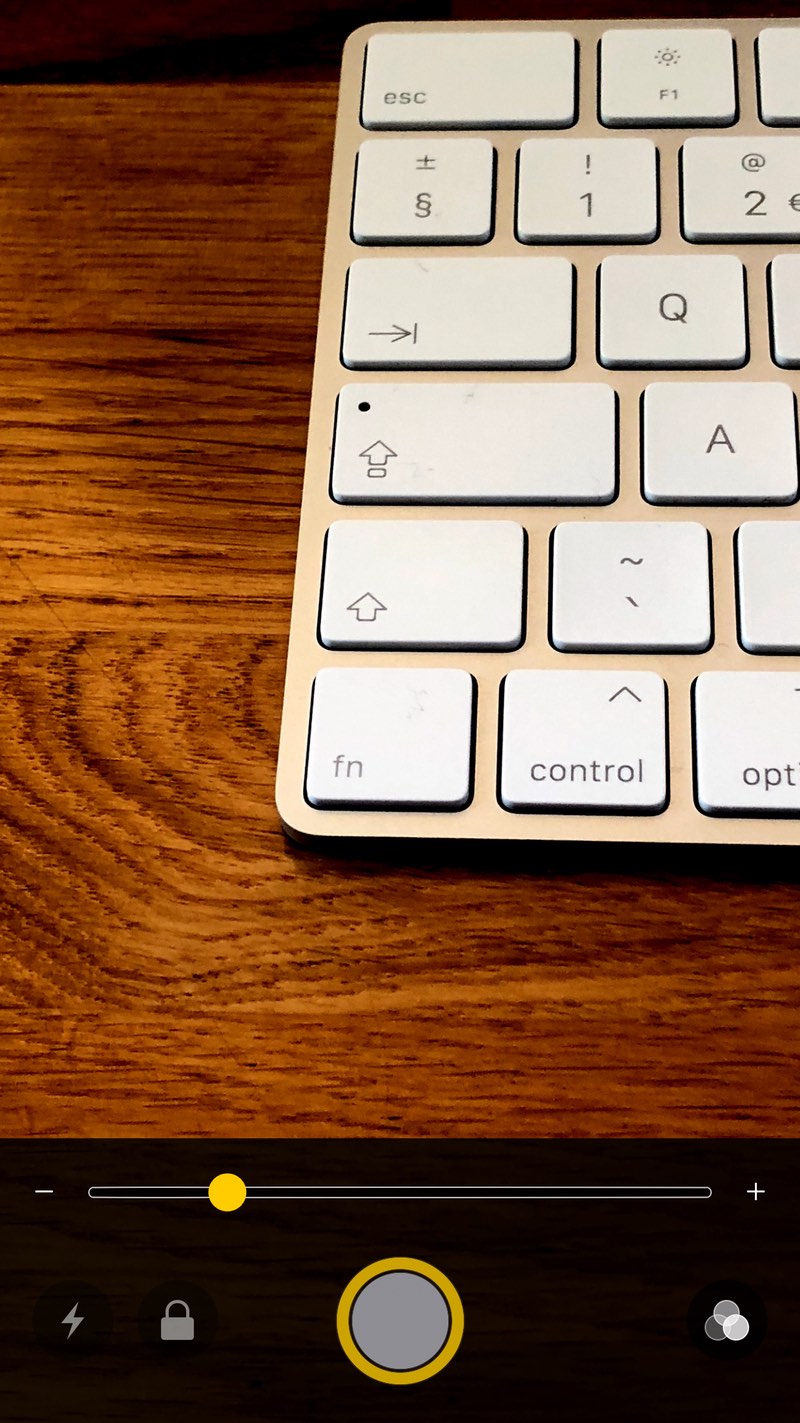
When active, the magnifier uses the camera lens to blow up what it sees. You can adjust the magnification using the yellow slider (see the screenshot below); turn on the flash to light up what you’re looking at by tapping the lightning bolt icon; freeze the focus by tapping padlock icon; and freeze what the magnifier displays by tapping the big white button. You can also change the brightness and contrast, colors, and more by tapping the filter button at the bottom right.
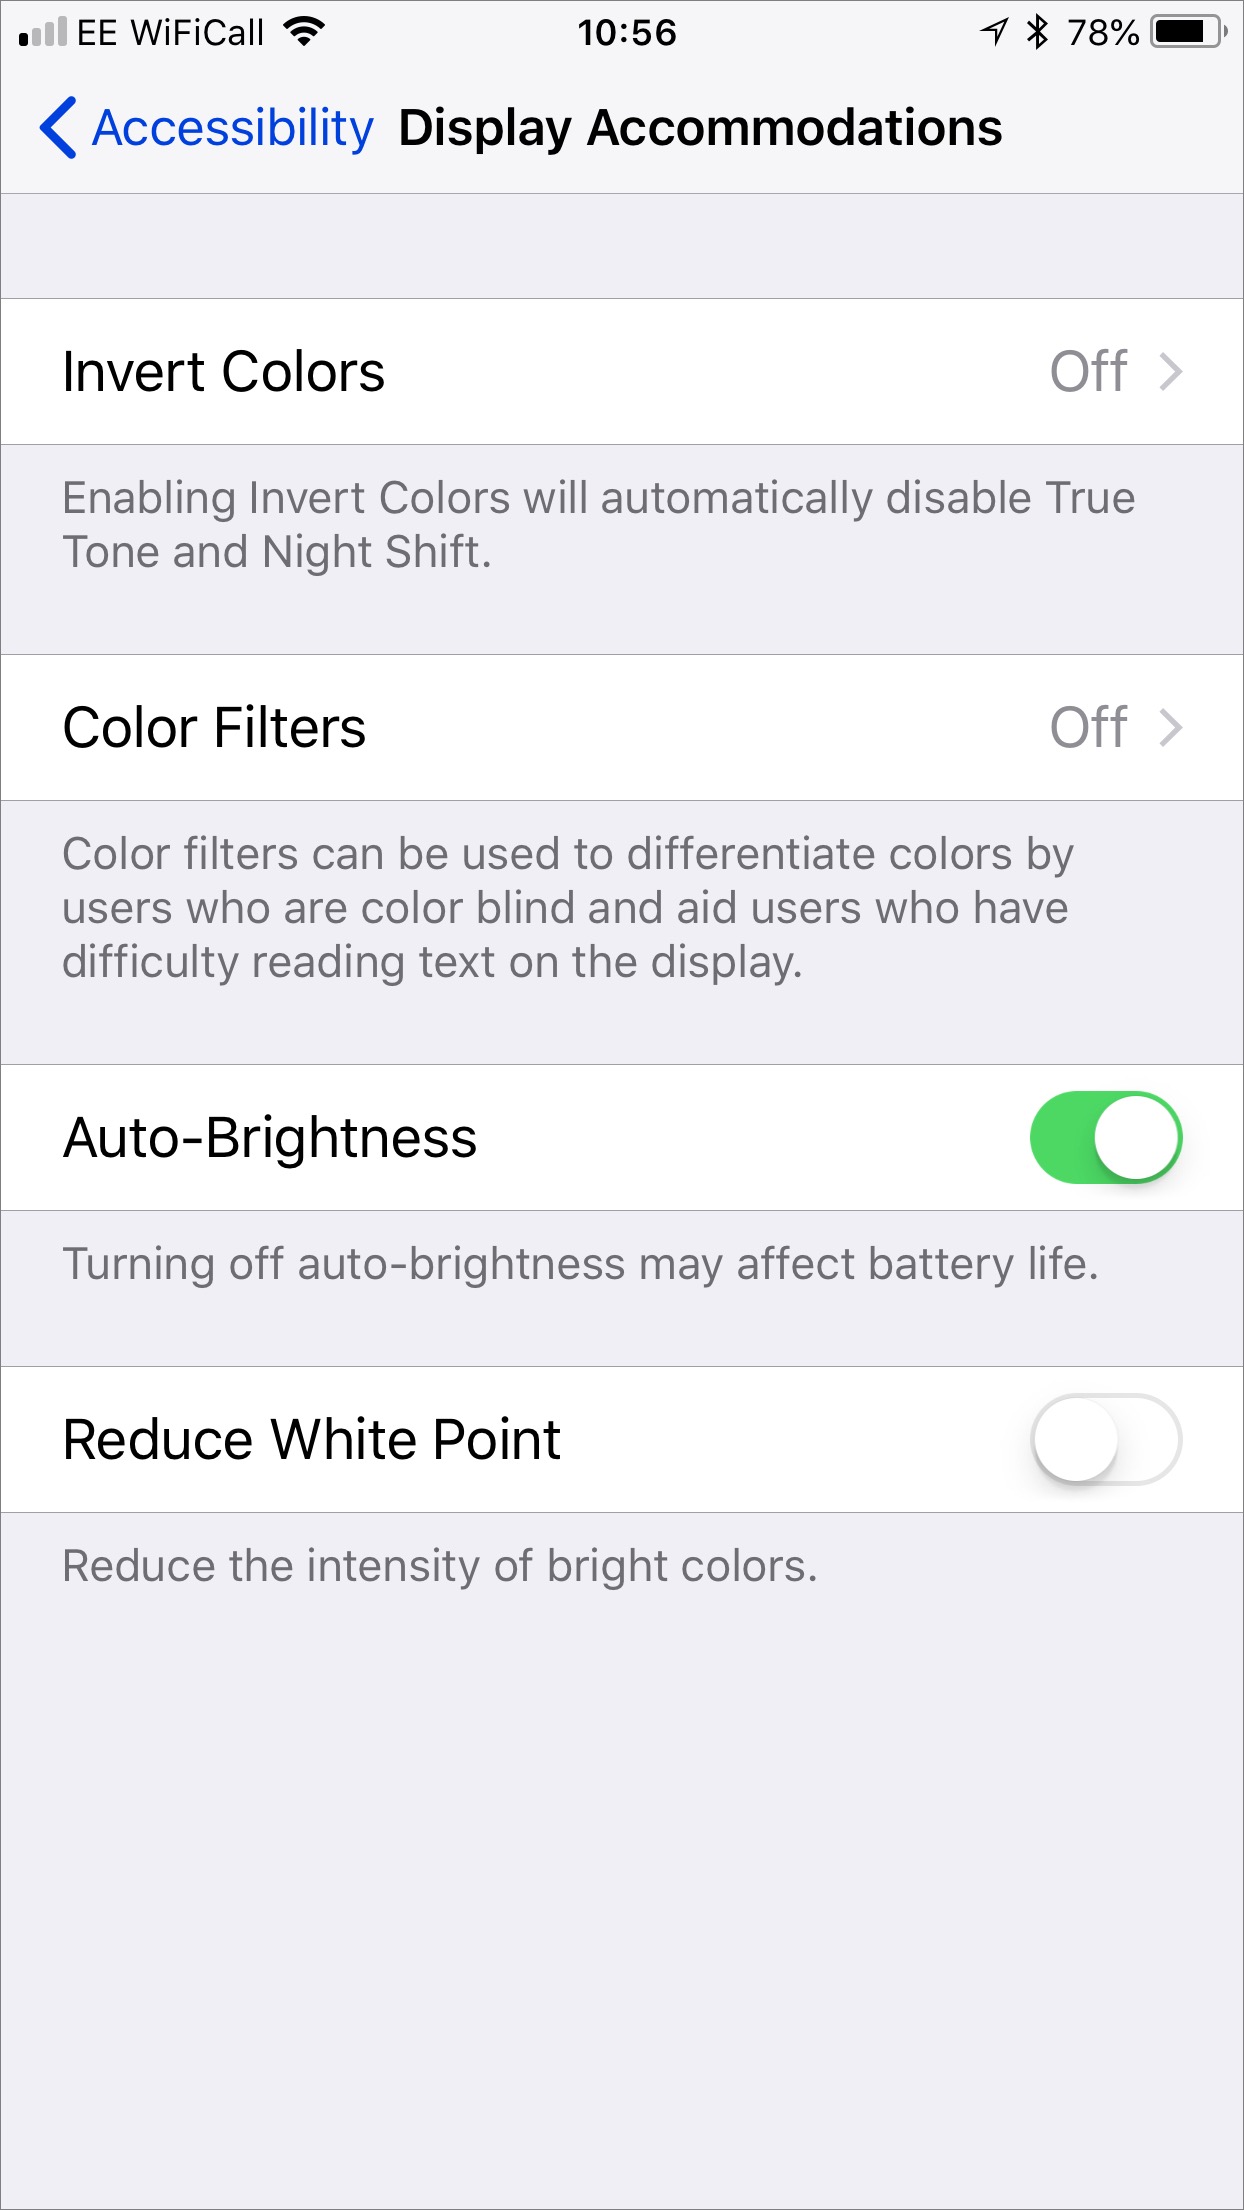
In the Display accommodations section, you can turn on auto brightness, which may use more of your battery power, but which makes the display easier to see in bright surroundings. And if you feel that you use your iPhone or iPad too much, you might want to try going to the Color Filters setting and changing it to Grayscale. Some researchers think that a grayscale smartphone is less interesting, leading people to use it less. The other color filters there are for people with various forms of color blindness (protanopia, deuteranopia, or tritanopia).
(I’d like to show you what the grayscale setting looks like, but when I take a screenshot of the iPhone in grayscale, the resulting image is in color.)
Additional vision accessibility settings
A few other vision settings that are worth checking out:
- Bold text: If you have trouble reading your iPhone’s text, you might want to turn this on. It’s especially useful if you work outdoors and need more prominent text in sunlight. Note that you have to restart your iOS device when you activate or deactivate this setting.
- Button shapes: Since iOS 7, buttons aren’t always clearly delimited. Activating this setting underlines buttons, but not everywhere.
- Reduce motion: This prevents iOS from zooming when you launch apps, and performing other effects that may make some people dizzy. Activating this has the advantage of making your iPhone or iPad seem a bit snappier, because the effects take up some time.
Interaction settings
In the Interaction section, you’ll find a Home Button section. This lets you adjust the click speed and turn on the Rest Finger to Open setting, so you can unlock your iOS device by playing your finger on the Home button without pressing it.
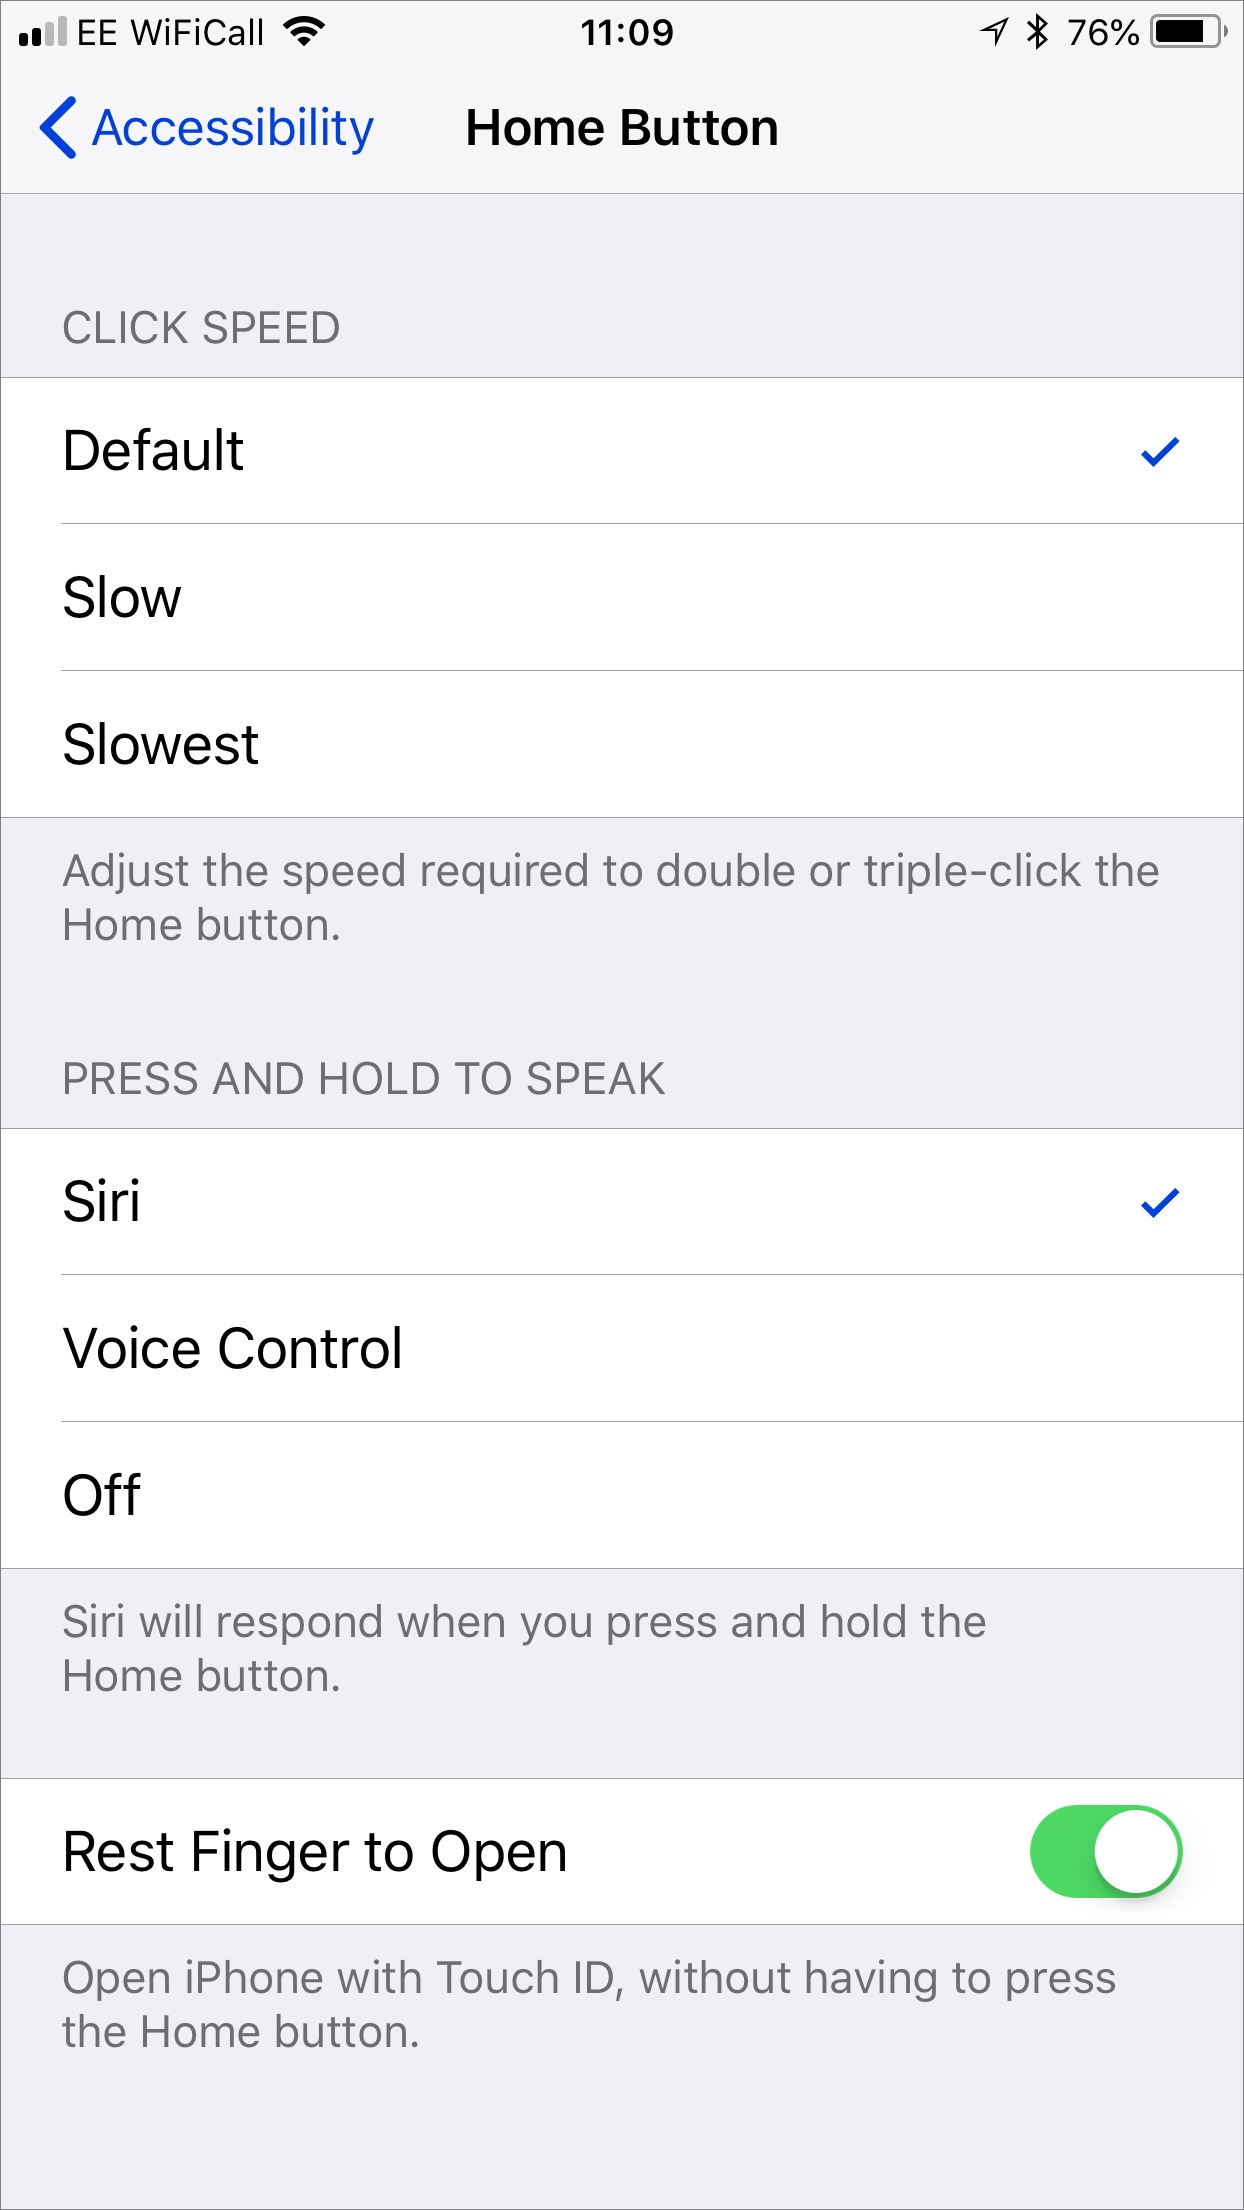
In this section, you can also turn on or off 3D Touch, if your device supports this feature; deactivate Shake to Undo, if it annoys you; and activate or deactivate vibrations.
Home button shortcut
A number of accessibility features can be activated by triple-pressing the Home button. At the very bottom of the Accessibility settings you’ll find an Accessibility Shortcut option. You can choose which features will be turned on and off by a triple press. If you choose more than one, then triple-pressing the Home button displays a menu asking you which feature you want to activate.
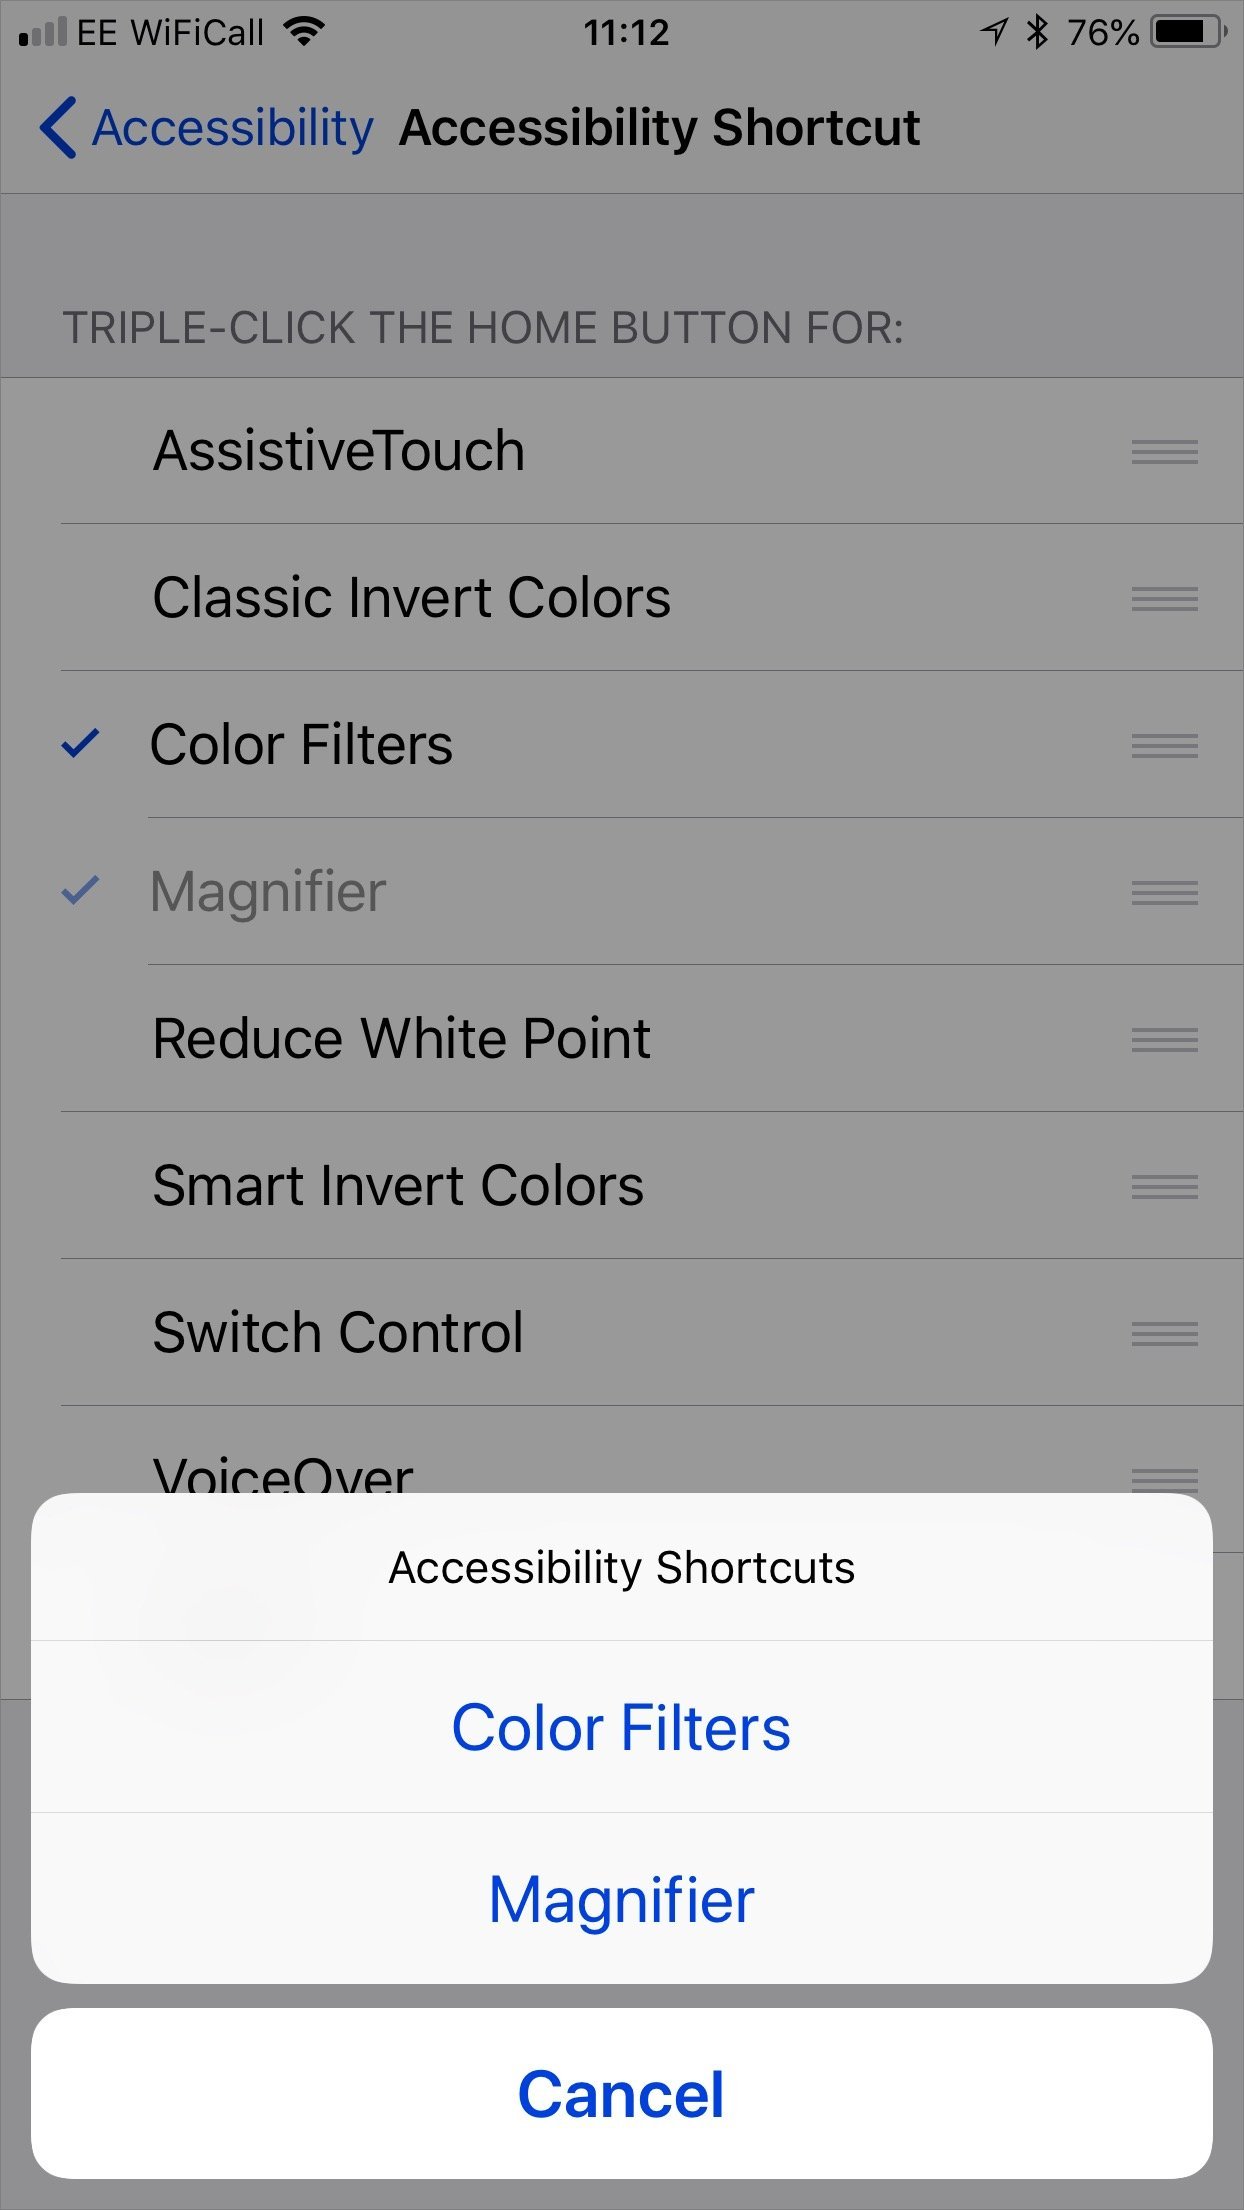
I have the Magnifier set to activate on a triple press, which makes it really easy to access it at any time. But if you use any of the other features, add them as well, to have quick access.
This was just a brief overview of what is a wide range of settings that can make using your iOS device more agreeable. Take some time to browse these settings; you may find other things that would help you use your device more efficiently.
Further Reading:
- Use Your Mac More Efficiently with Accessibility Options
- 5 Ways macOS Accessibility Features Can Benefit Everyone
- Get ‘Hey Siri’ on Your Mac – or Use Siri in Total Silence
How can I learn more?
 Each week on the Intego Mac Podcast, Intego’s Mac security experts discuss the latest Apple news, including security and privacy stories, and offer practical advice on getting the most out of your Apple devices. Be sure to follow the podcast to make sure you don’t miss any episodes.
You can also subscribe to our e-mail newsletter and keep an eye here on The Mac Security Blog for the latest Apple security and privacy news. And don’t forget to follow Intego on your favorite social media channels: ![]()
![]()
![]()
![]()
![]()
![]()
![]()
