How to Install Apple Beta Software for macOS Sequoia, iOS 18, iPadOS 18, watchOS 11, and tvOS 11
Posted on
by
Kirk McElhearn
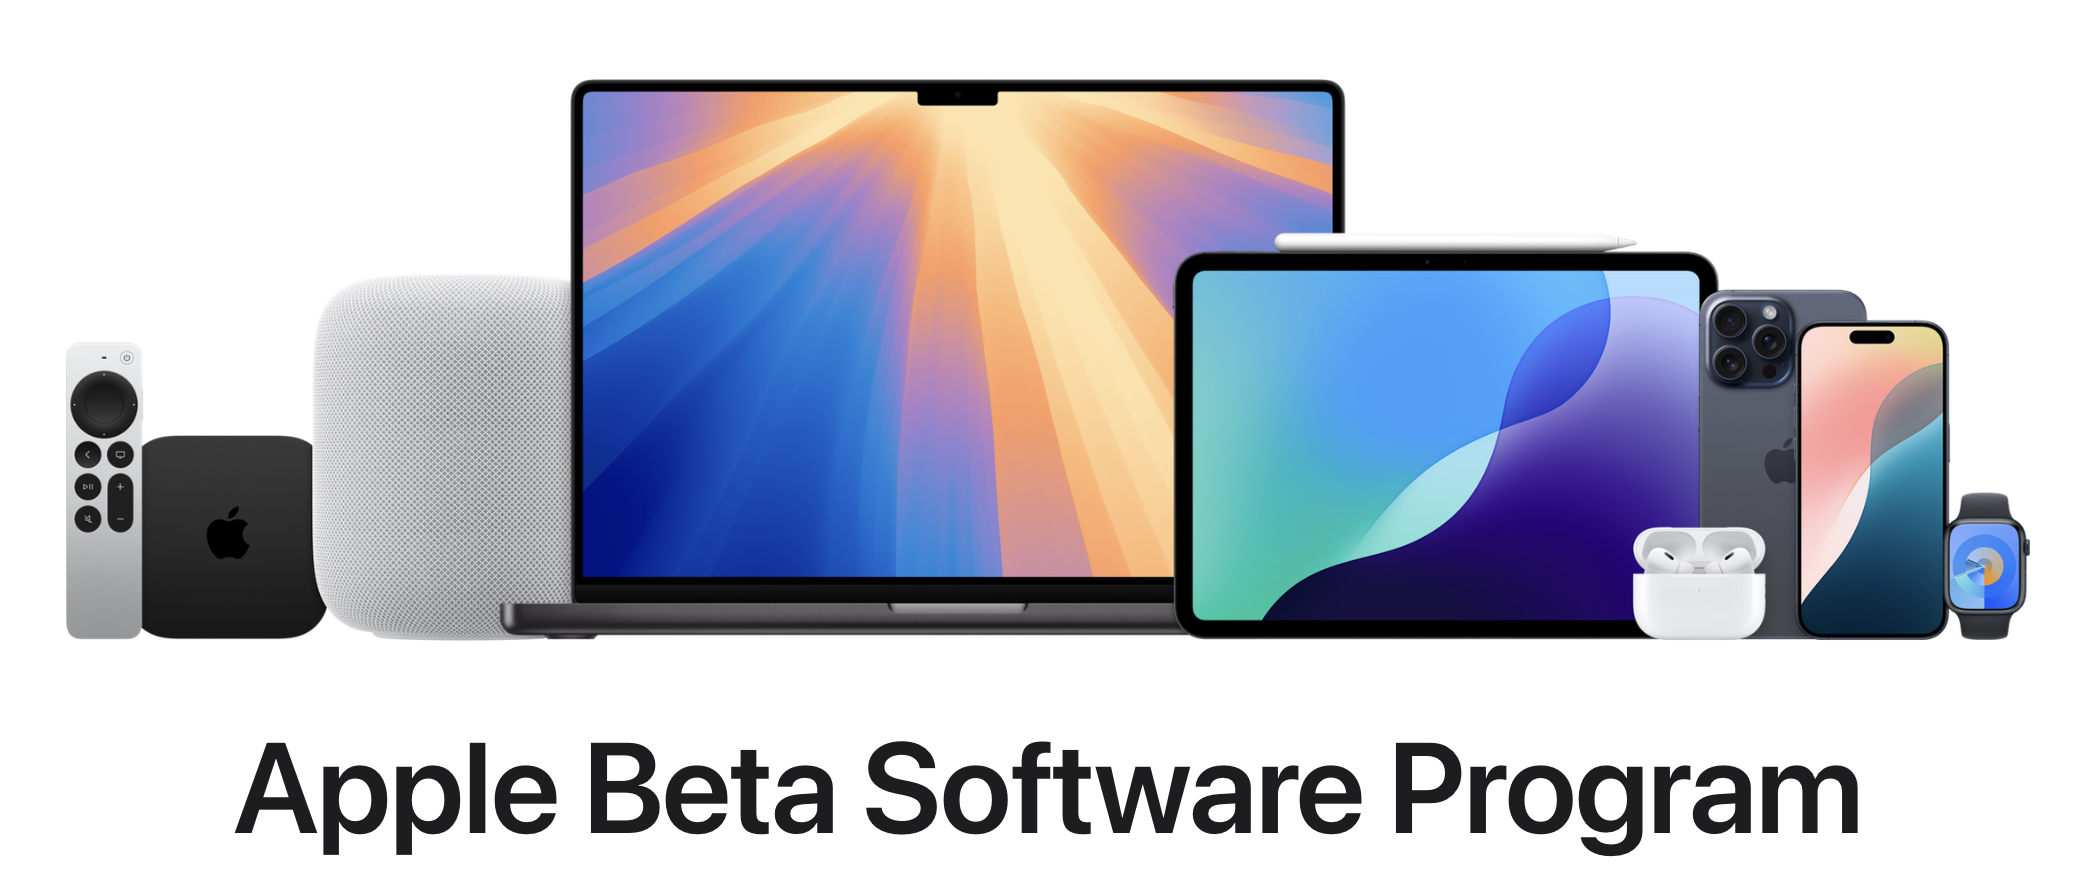
Beta software is pre-release software, designed for developers to test against their apps to ensure that everything runs smoothly. It is also used internally to check for bugs and compatibility. If you’re really into your Apple products, and like to be the first to try out what’s new, you might have signed up for Apple’s public beta releases in recent years.
In the past, you may have paid $99 a year for a developer account to give you access before the public beta’s were released. Apple changed its policy for developer accounts in 2023. Now, you no longer need a paid developer account to access beta releases of Apple software.
While you so still need a $99 per year developer account to distribute software on Apple’s App Stores, or to notarize macOS software that you create to distribute directly, anyone can now install Apple’s beta software for free. You can choose to either install developer betas, or wait until Apple releases public betas. The public betas for Apple’s 2024 operating systems are available now.
Here’s how to install beta software for Apple’s new operating systems—and why you probably shouldn’t do this.
Why you shouldn’t install beta software
It may be tempting to get access to new features on your computer and devices a few months before everyone else. But by doing this, you take risks with your data. Beta software is, by definition, unfinished, and may not work as you wish. As Apple says, “since the beta software has not yet been commercially released by Apple, it may contain errors or inaccuracies and may not function as well as commercially released software.”
Running beta software may mean that certain features may not work, and that you may not be able to perform all of the tasks that you usually perform with your Mac, iPhone, or iPad. In addition, a lot of third-party software is likely to be incompatible at the time these betas are issued. App developers use the three months between Apple’s Worldwide Developer Conference and the release of these operating systems in the fall to ensure compatibility with their software.
Again, Apple warns that you should, “Install the beta software only on non-production devices that are not business critical. We strongly recommend installing on a secondary system or device, or on a secondary partition on your Mac.”
And especially when it comes to macOS Sequoia, don’t expect any software that requires deep OS integration (for example, antivirus, firewall, or other security protection software) to be 100% compatible at this point.
With this in mind, we will explain how you can install this beta software on your Apple devices.
How to install macOS Sequoia beta software on a Mac
Of Apple’s various operating systems, macOS betas are the safest ones to install, because you can install them side-by-side with the current operating system on your Mac. There are several ways to do this.
1. Install on a separate APFS volume
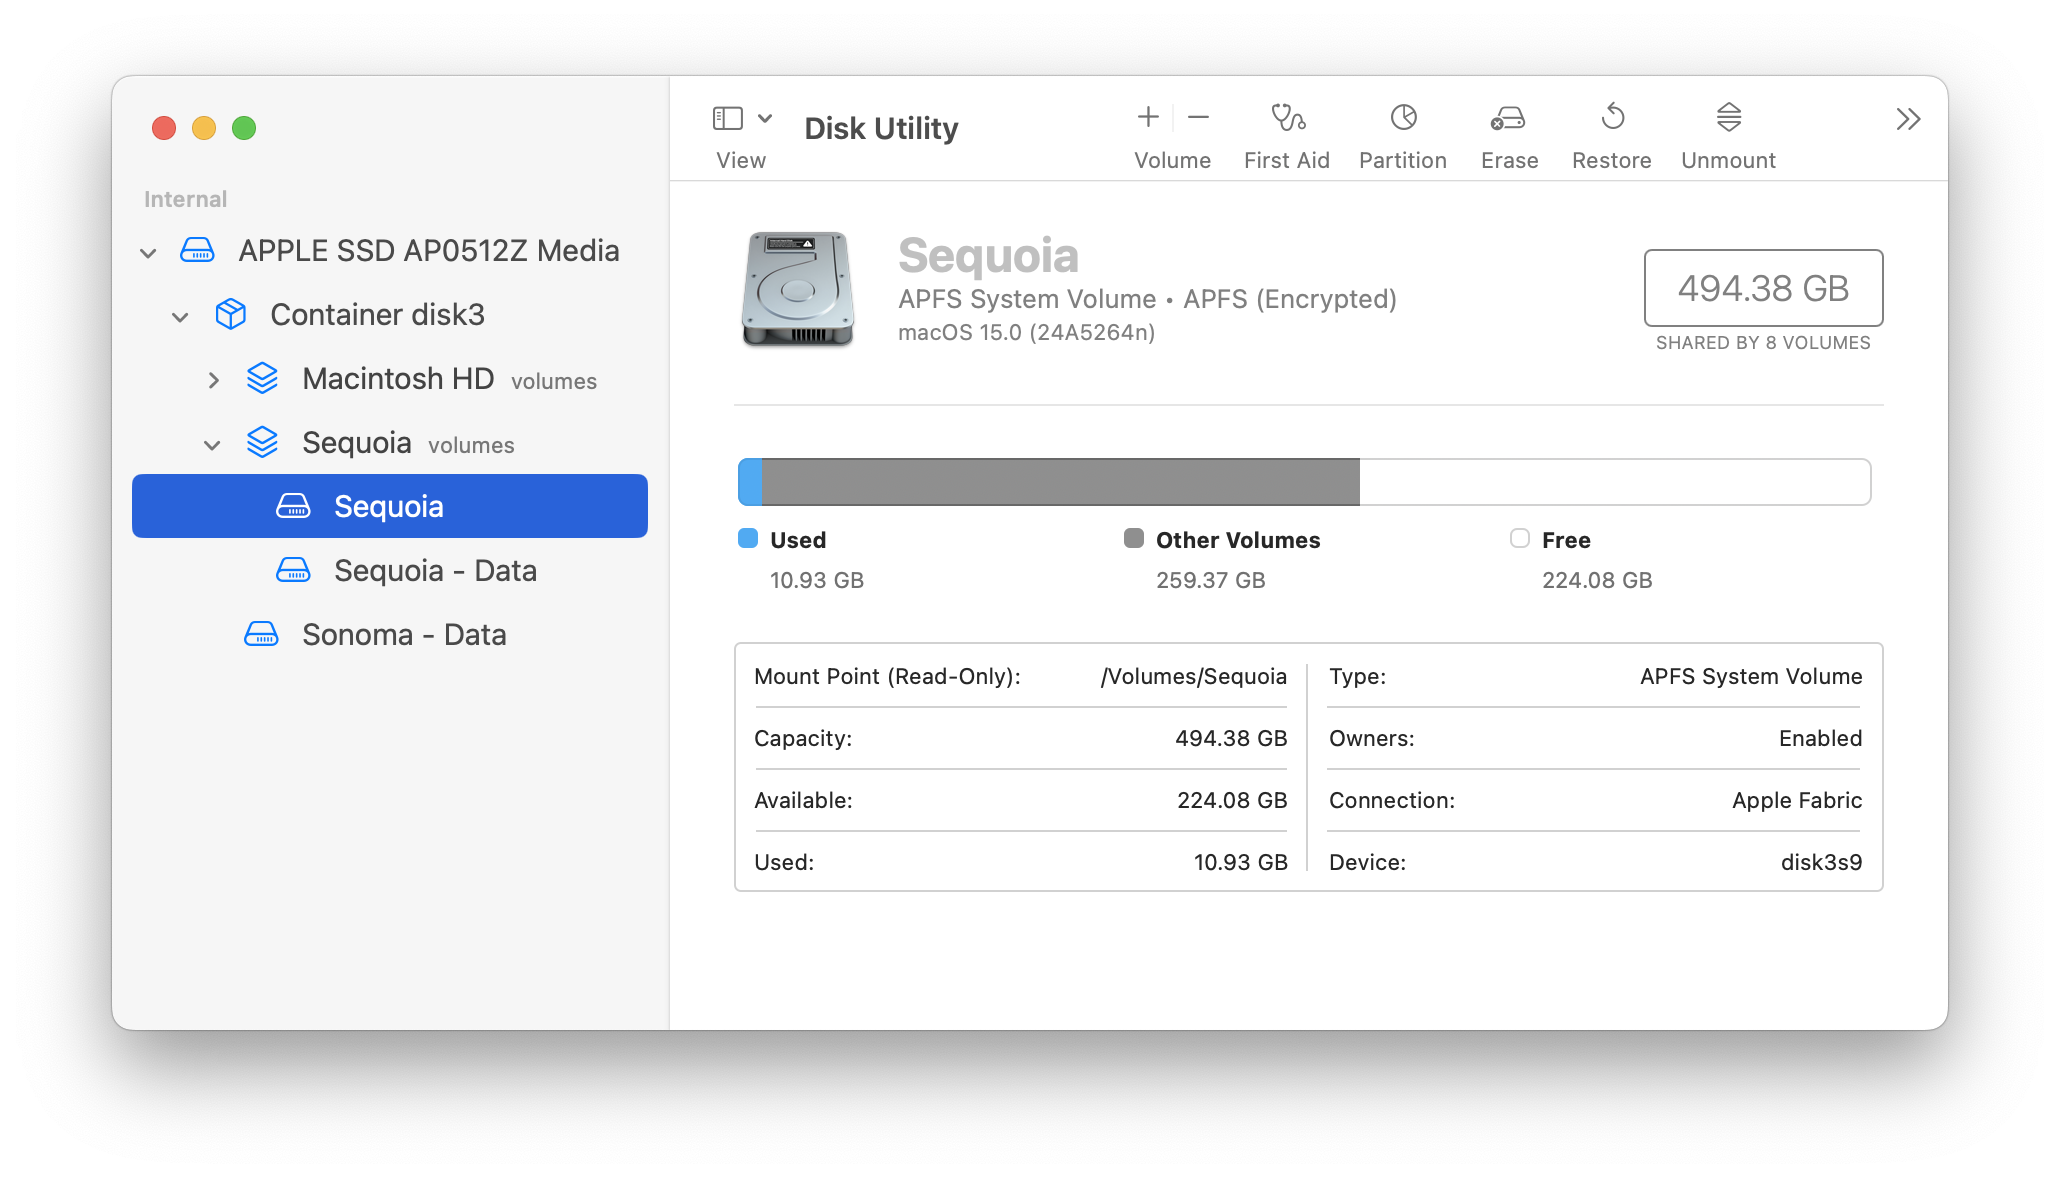
Macs use APFS, or the Apple File System, to create volumes on computers. A volume is like a virtual disk, similar to a partition, and you can install macOS betas in a second APFS volume on any Mac. To learn how to do this, read Install macOS Betas on Your Mac in a New APFS Volume. You can then choose to restart your Mac from either volume; to do this, go to Settings > General > Startup Disk, choose the volume you want to use, then click Restart.

After you have done this, you need to install the macOS Sequoia beta on the new volume. Apple’s developer lets you download a restore image, which is not easy to use: it requires Apple Configurator software, and a second Mac, to install the software.
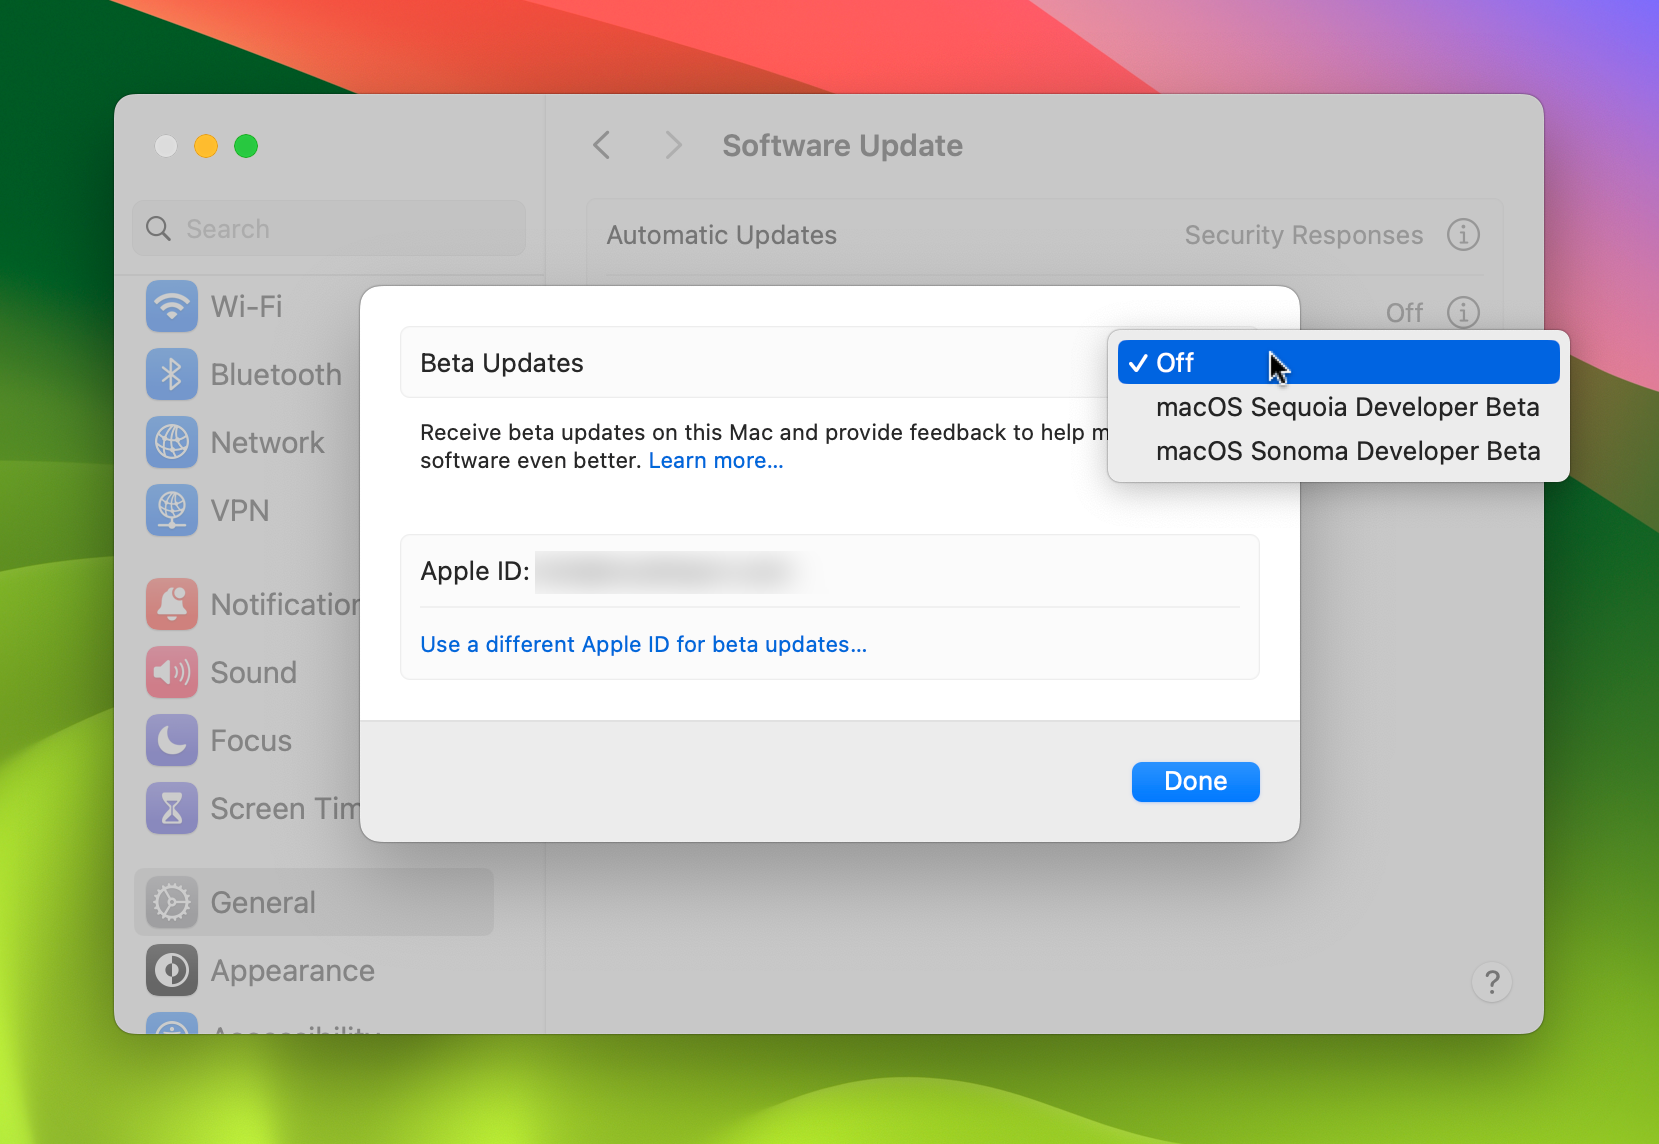
There are two other ways to get macOS Sequoia on your second APFS volume. The first is to install macOS Sonoma, using an installer you download from the Mac App Store, restart your Mac from the second volume, then tell operating system on that volume that you want to receive beta updates. To do this, go to Settings > General > Software Update, click the i next to Beta Updates, and choose which operating system’s betas you want to receive. If you select macOS Sequoia, you’ll get a notification that an update is available, and you can download it and install it normally.
The second way is a bit of a shortcut. The Mr. Macintosh website has links to macOS installers, and has a page with links to the macOS Sequoia beta installers. You can download this installer, then run it from your macOS Sonoma volume, selecting the second APFS volume to install the software.
2. Install macOS betas on an external disk
In order to install macOS beta software on a second APFS volume, you need to have sufficient disk space. The software doesn’t initially take up a lot of space; my installation used about 20 GB. But if you want to install additional apps, and work with lots of files, you may need more space. In addition, you may not want the hassle of having two volumes on your Mac.
If you want more space, you can install the beta software on an external disk. The easiest way to do this is buy a portable SSD that connects to your Mac, and install the macOS Sequoia beta as described above, selecting that external drive instead of the second volume as the target for the installation. You will need to have this disk tethered to your Mac to use the new software, but this isolates the new software completely from your current operating system.
3. Install macOS betas in a virtual machine
Some people may want to install macOS betas in a virtual machine. This uses software that creates its own volume on the drive, which is isolated from the rest of the data on that computer. The advantage of this is that you can run the macOS Sequoia beta software in a separate window while you are still running macOS Sonoma on your Mac.
You can do this using VMware Fusion, Parallels Desktop, or the free UTM. You can read our article Install macOS Beta in a Virtual Machine on an M1 or M2 Mac with UTM to find out how to do this with UTM.
There is one limitation to using macOS betas in virtual machines: you cannot sign into your Apple ID. This means that you cannot access iCloud, you cannot sync data such as contacts and calendars, or use any Apple services that require an Apple ID.
How to install iOS 18 or iPadOS 18 betas on an iPhone or iPad
Installing beta software on an iPhone or an iPad is much simpler, but comports more risk, since you cannot set up a second volume on these devices. We strongly recommend that you do not install beta software on a device that you use for everyday activities. If you have an older iPhone or iPad that you can use for testing, this is greatly preferable. Beta software could, potentially, brick your device.
To install iOS 18 or iPadOS 18, go to Settings > General > Software Update. Tap Beta Updates, then tap iOS 17 Developer Beta or iPadOS 18 Developer Beta. You will see a prompt to install the current beta software, then you will be notified when new betas are released.
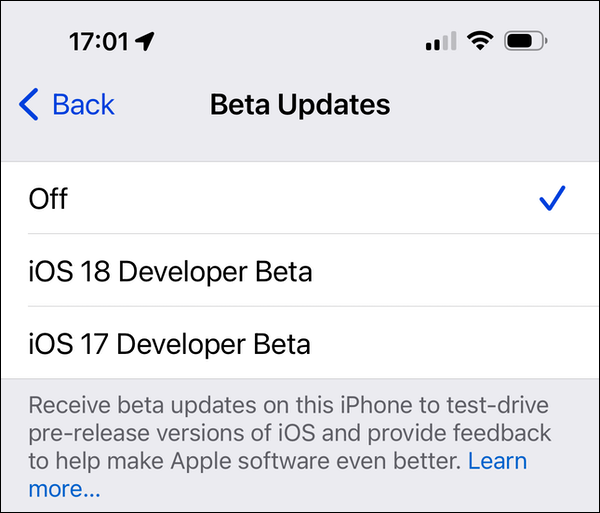
If you don’t see betas on your device, you may need to sign into developer.apple.com.
How to install watchOS betas on an Apple Watch
Before installing a watchOS 10 beta on your Apple Watch, be aware that once you have done this, you cannot downgrade back to watchOS 9.
To install watchOS 11, go to the Watch app, then tap General > Software Update. Tap Beta Updates, and choose which updates you want to receive. As with an iPhone or iPad, you’ll be prompted to install the first beta, then you will be notified when other betas are available.
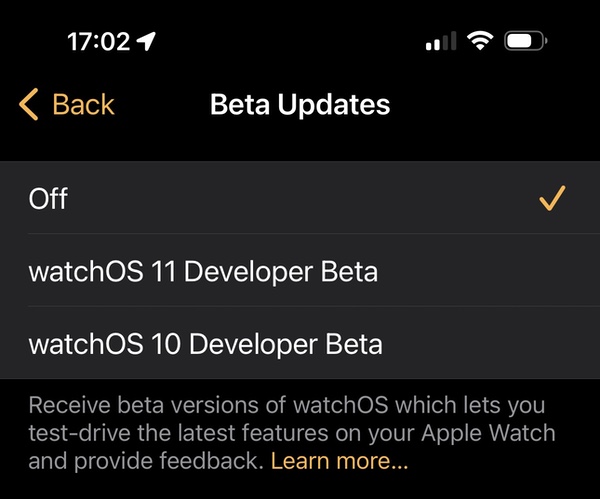
How to install tvOS betas on an AppleTV
To install tvOS 11, go to the Settings app, then choose System > Software Updates. Choose Get Beta Updates, then and choose which updates you want to receive. As with an iPhone, iPad, or Apple Watch, you’ll be prompted to install the first beta, then you will be notified when other betas are available.
It can be fun to check out all the new features of your favorite operating systems now, but it can be a lot safer to wait until the official release in the fall.
What about other Apple platforms: HomePod and Vision Pro?
This year, you can also install the public beta of HomePod Software 18. In the Home app on an iPhone running iOS 18 beta, tap the ellipsis (…), then tap Home Settings. Tap Software Update, and you’ll see an option at the bottom of the screen to turn on beta updates for the HomePod. Note that you don’t see this setting on an iPad running iPadOS 18 beta software.
Apple is not offering a public beta version of visionOS 2. You’ll have to use a developer beta to access pre-release versions of the Apple Vision Pro operating system.
How can I learn more?
Each week on the Intego Mac Podcast, Intego’s Mac security experts discuss the latest Apple news, security, and privacy stories, and offer practical advice on getting the most out of your Apple devices. Be sure to follow the podcast to make sure you don’t miss any episodes.
You can also subscribe to our e-mail newsletter and keep an eye here on The Mac Security Blog for the latest Apple security and privacy news. And don’t forget to follow Intego on your favorite social media channels: ![]()
![]()
![]()
![]()
![]()
![]()
![]()
