Customize and Personalize Your MacBook Pro’s Touch Bar
Posted on
by
Craig Grannell
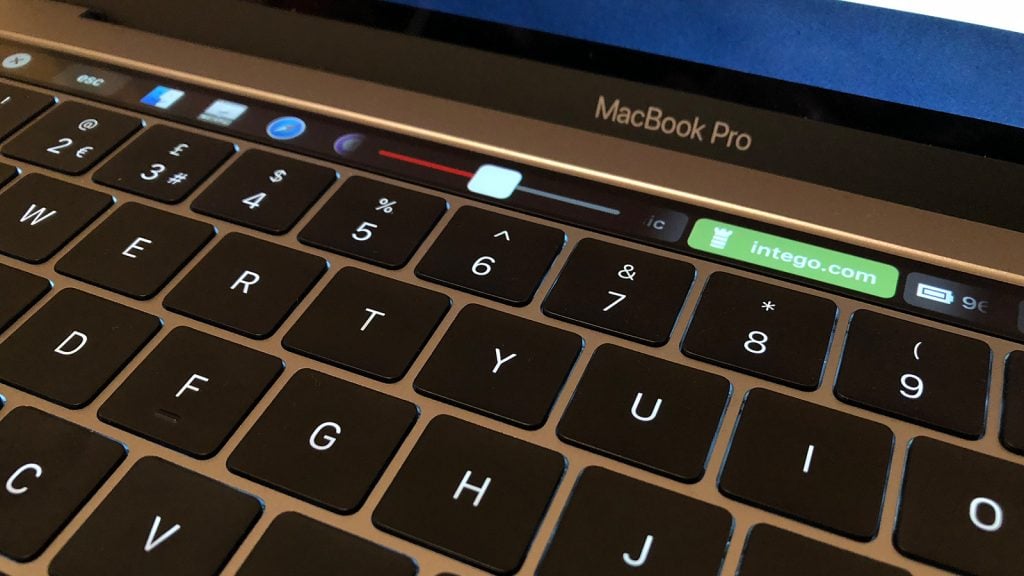
In 2016, Apple introduced the Touch Bar. This touchscreen strip replaces the function keys on higher-end MacBook Pro models with a touchscreen canvas. Apps can use this to surface controls appropriate to the task you’re performing.
We elsewhere outline how to use the Touch Bar, and the customization options Apple offers. However, Apple’s settings only allow you to rearrange a small number of pre-defined buttons. Install BetterTouchTool and you can go much further.
Create a custom Touch Bar button
BetterTouchTool enables you to assign actions to all kinds of input devices – check out our guide on using it to power up your Mac’s trackpad. But here we’re interested in the Touch Bar, and so click the TouchBar tab to get started.
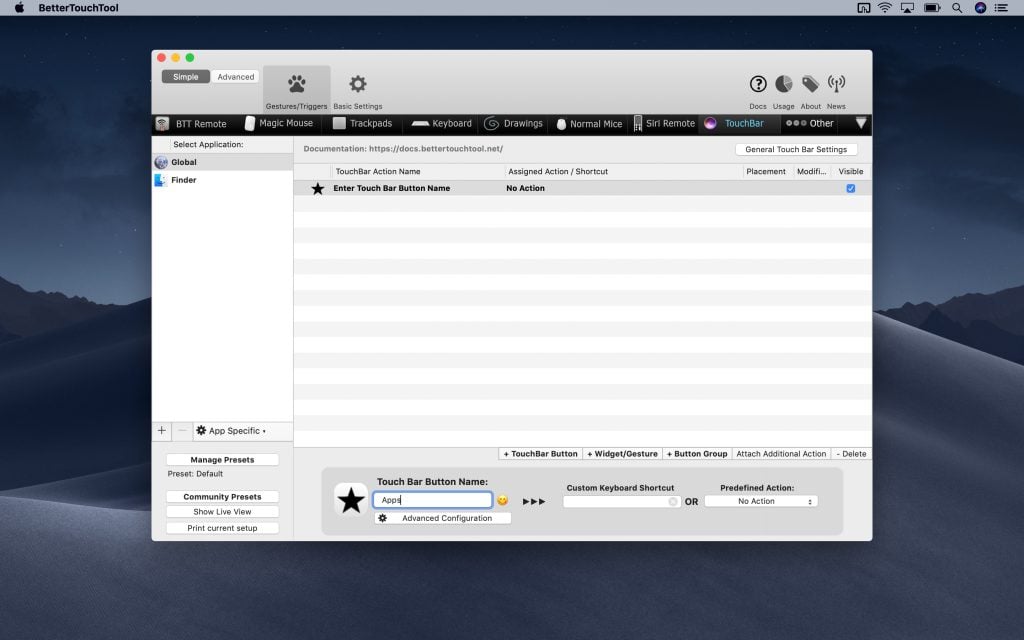
We’ll first create a button to open your Applications folder. Ensure Global is selected in the Select Application sidebar. Click TouchBar Button to create a new button, and then click Add Icon. Scroll down and drag the star icon to the Add Icon area. In Touch Bar Button Name, type Apps.
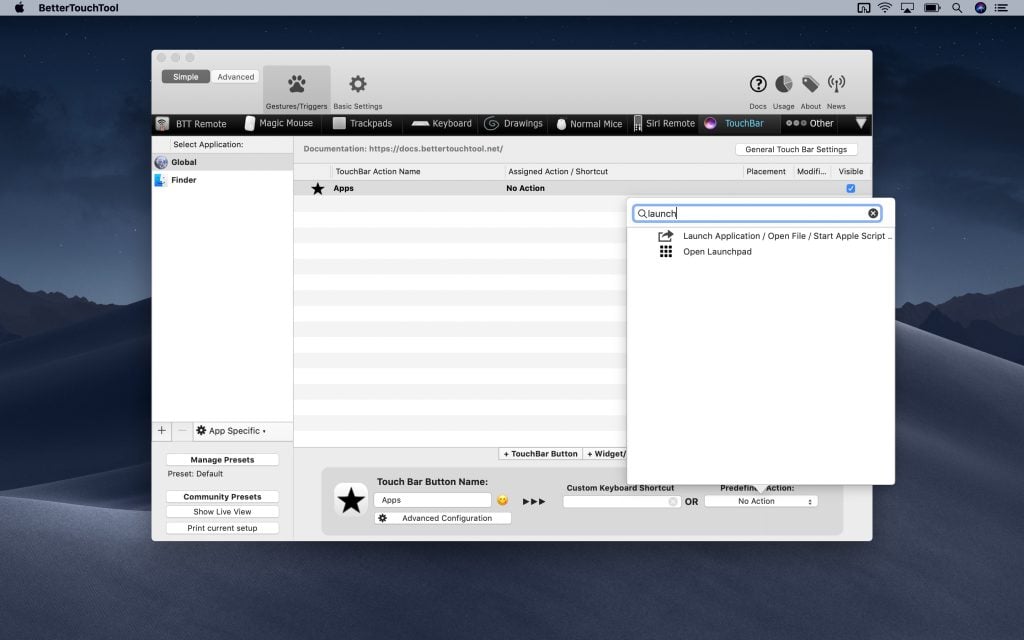
From the Predefined Action menu, type launch in the search field, and then double-click Launch Application/Open File. Select your Applications folder in the dialog box (taking care to ensure the folder is selected – not an individual app) , and then Open.
If the BetterTouchTool strip is not already open on your Touch Bar, tap its icon. You should see your Apps button. Tap it and your Applications folder will open in Finder.
![]()
Get started with Touch Bar widgets
BetterTouchTool also includes a handful of readymade widgets you can add to your Touch Bar. Click Widget/Gesture, and then click the Select Widget menu. You’ll see widgets that mirror menu bar items (Remaining Battery Time; Date / Time), but the App Switcher and slider options are more interesting.
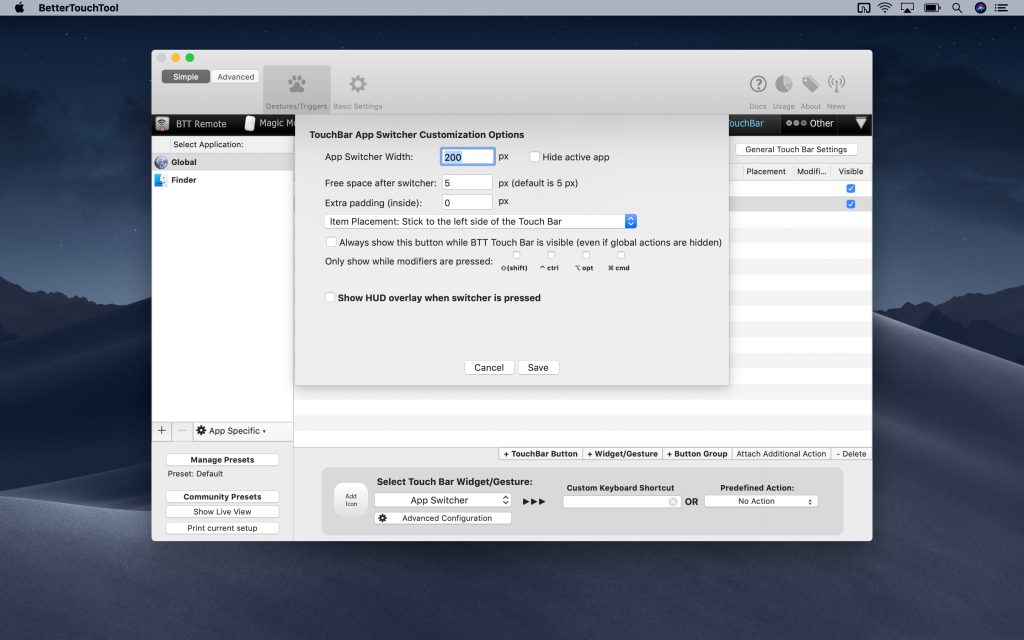
Click App Switcher and a pane slides down for you to set its options – leave them alone for now and click Save. (You can always go back to later adjust them by double-clicking App Switcher Widget in your list of actions.)
Your Touch Bar will now display an app switcher, to let you quickly tap between open apps. Drag it left or right to see any that are hidden.
![]()
Next, add a Volume Slider widget. Functionally, this is no different from Apple’s. From a usability standpoint, though, you don’t need to first tap a volume button, and then make adjustments – the entire slider is always active. If you feel it takes up too much space, open its options and have it only appear when a modifier is pressed.
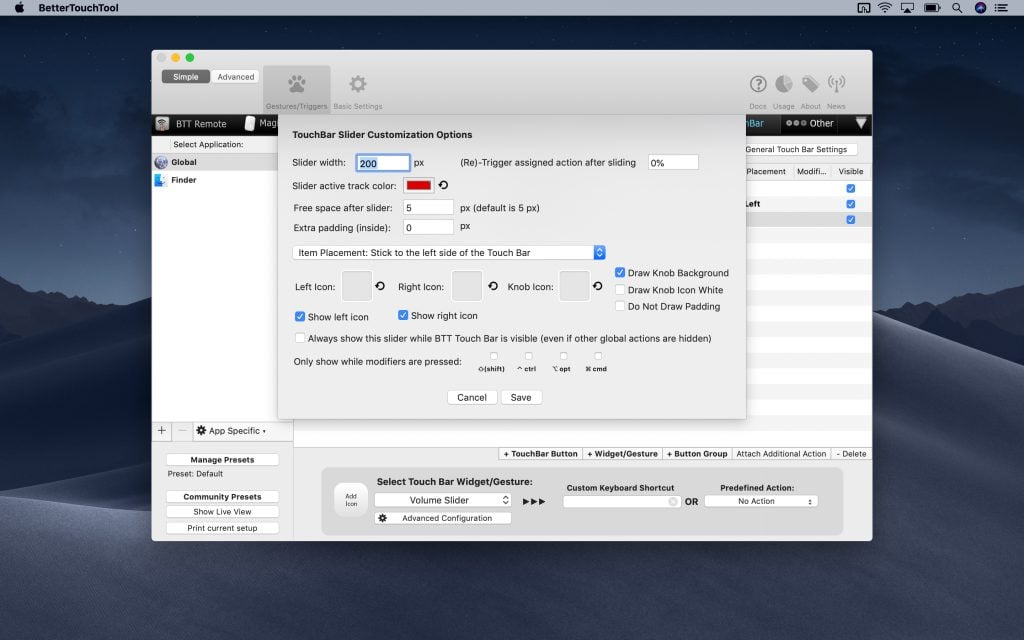
Further customize your Touch Bar
Once you’ve got a hang of the basics, you can take customization further in terms of aesthetics and functionality.
Select an existing button from the list and then click Advanced Configuration. A pane will slide down, offering a slew of options, including being able to change the button’s color, font, and padding. You can define whether only an icon is displayed (thereby hiding the button’s name), and whether you need to hold down a modifier key to show the button.
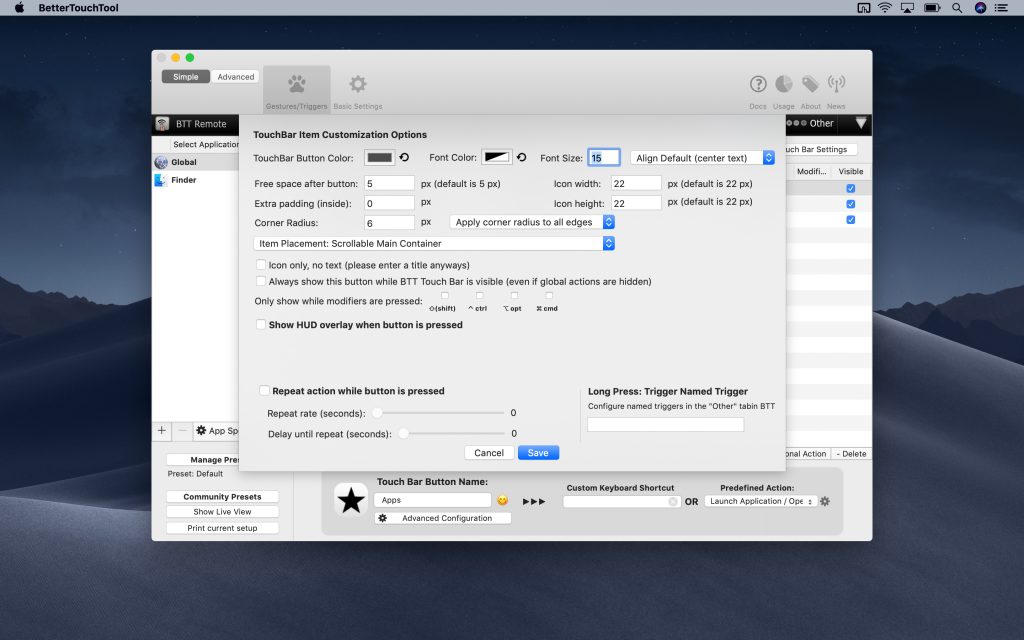
The Add Icon area mentioned earlier is drag aware from Finder. This means that if you’re good with a graphics package, you can make a personalized monochrome PNG to drag on to that area. For example, if you create a button that uses an Open URL action to launch a website in Safari, you could set its icon to be the website’s logo.
Elsewhere, you can add apps to the Select Application sidebar, and then create buttons and widgets that only appear when you’re working within specific applications. And by using General Touch Bar Settings, you can even have BetterTouchTool completely take over the Touch Bar – just deselect Show macOS Control Strip!
Further reading:
- Master the Touch Bar – and Get One on Any Mac (or iPad)
- Unlock the Power of Your Mac’s Trackpad
- Unlock the Full Power of the macOS App Switcher