How to Color Calibrate Your Mac’s Display
Posted on
by
Kirk McElhearn
If you only use your Mac for browsing the Web, sending and receiving email, and working in a word processor, it’s probably not that important for it to display accurate colors. However, if you work with photos or videos, or even if you like to watch movies in the best possible conditions, color calibrating your display is essential.
The calibration process tweaks a number of settings to get the colors and contrast on your Mac as accurate as possible. It does this by changing the intensity of the main colors — red, blue, and green — and setting the white point, or the neutral white color that you see when, say, you open a new document in a word processor.
It’s easy to color calibrate your Mac’s display, and you can do so quickly by eye, or you can use additional hardware to get your colors exactly right. Here’s how you can do it.
Note: the instructions below apply to most Macs, but if you have one of Apple’s M1 Pro or M1 Max MacBook Pros, with Liquid Retina XDR display, the process is very different. Given the way the displays are calibrated, you can only perform this calibration with a spectroradiometer, an expensive device that most users don’t have. See this Apple support document for more on calibrating the displays of these Macs.
Color Profiles
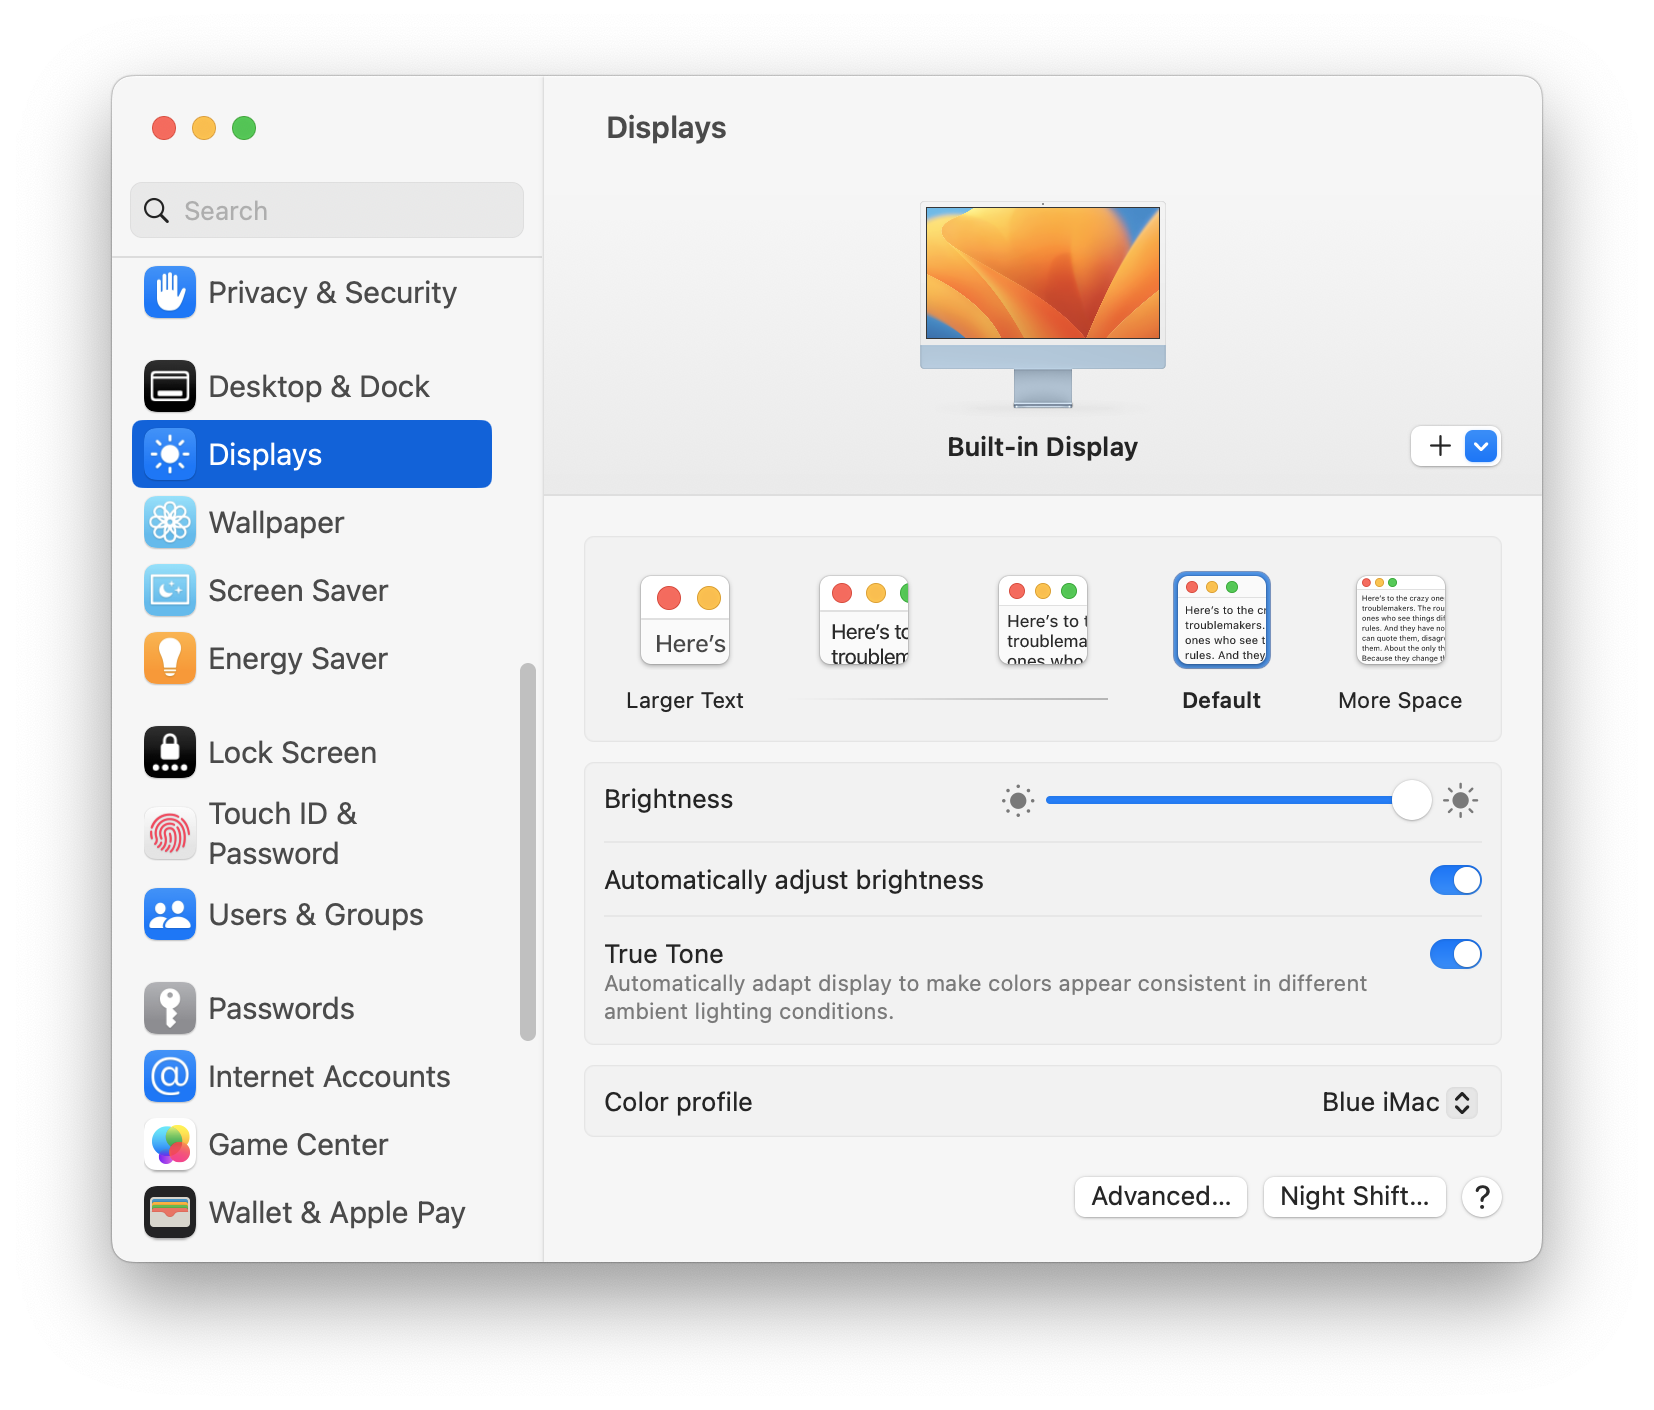
Color profiles are settings files that tell your Mac how to adjust the color and contrast of its display. Your Mac can store lots of color profiles, and you’ll find that it already has a handful. Go to System Settings > Displays, and you’ll see a color profile section at the bottom of the pane. Click this to see a list of color profiles installed on your Mac. These default profiles, with odd names, such as sRGB IEC61966-2.1, are specially designed for specific uses; you can safely ignore them.
However, if you work with photos, and need a specific color profile for paper for a printer, for example, you’ll be able to install these files. If you want the profiles to be available to all users on your Mac, add them to /Library/ColorSync/Profiles; if you just want them to be available in your user account, or if you’re the only user, add them to the /Library/ColorSync/Profiles folder in your home folder.
If you select one of the profiles in the list and press Return, you’ll see how different your display will look. Some are very blue, others lean toward purple, and most probably don’t look right. However, if you’re not interested on calibrating your display for photos or video, you may find one that you like better; feel free to choose it
You’ll probably find one called iMac (if you have an iMac) or Color LCD (on a laptop), which is selected. This is the profile your Mac is using. You can check Show profiles for this display only to hide all the profiles that aren’t for your display.
If you see a lot of profiles in the list with names like iMac or Color LCD, it’s worth checking their dates. If you’ve upgraded from one Mac to another, copying files from the older computer, you might find that an old profile, created for a different display, has been carried over.
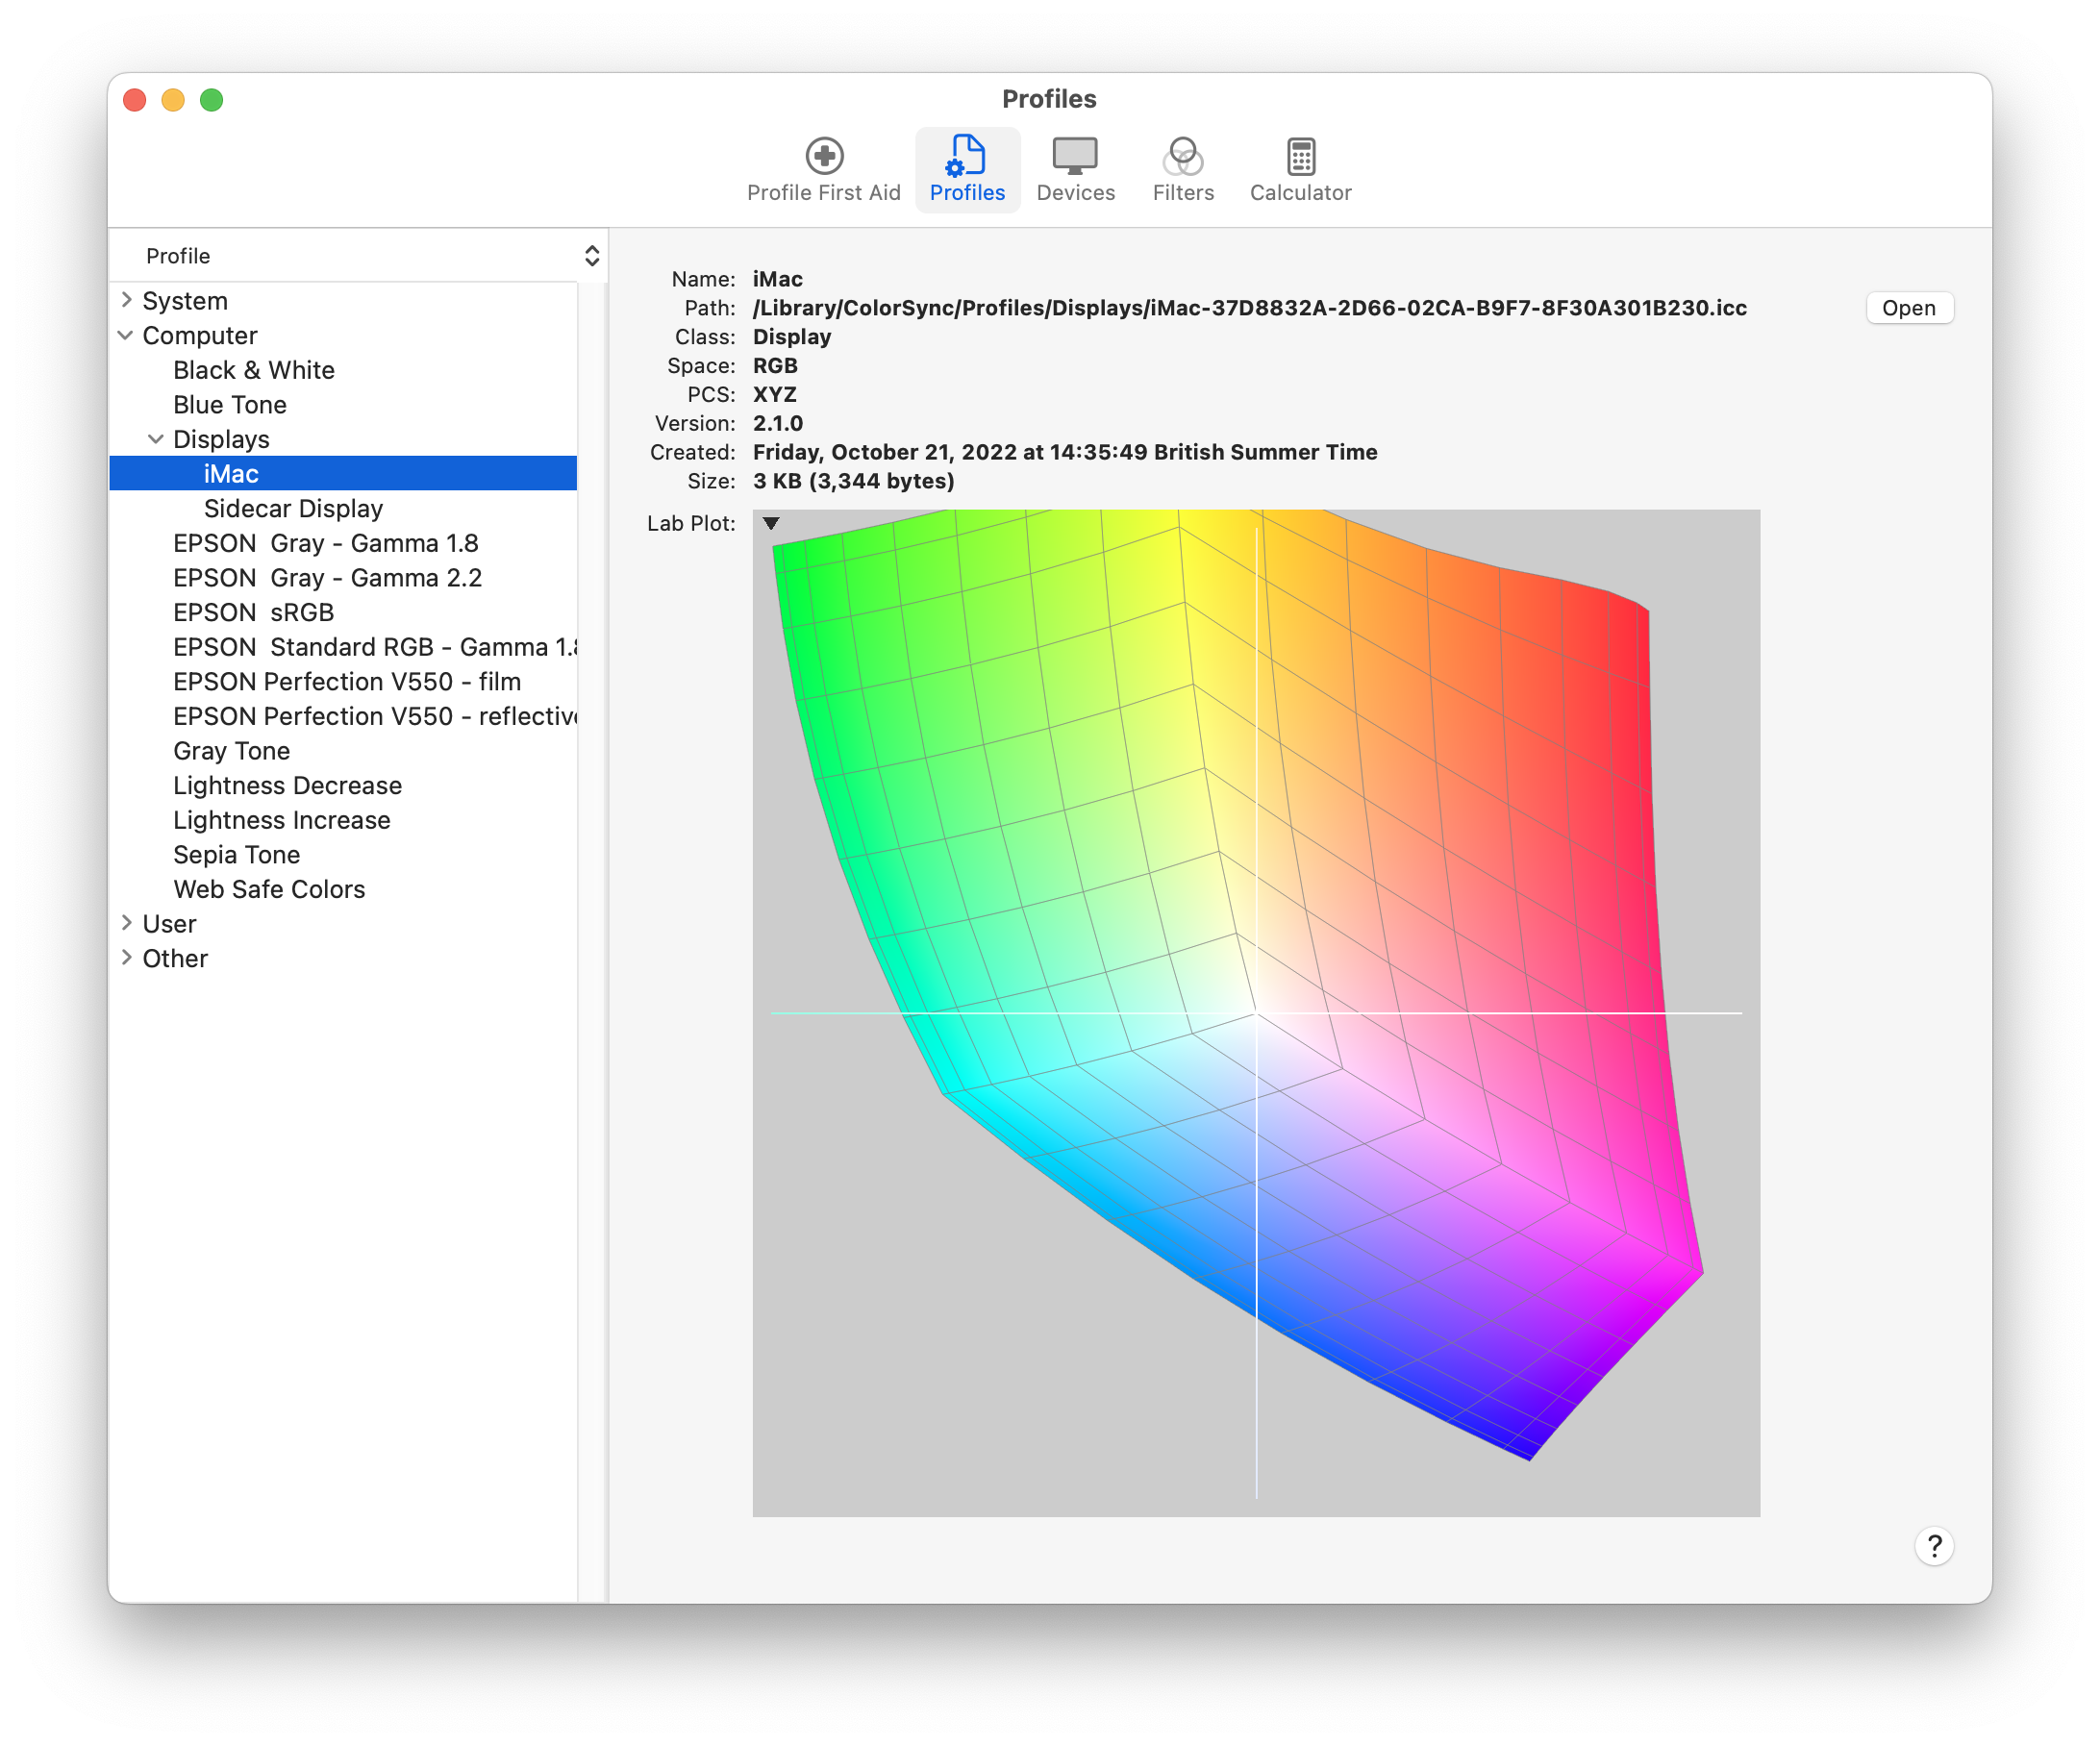
You can no longer delete profiles from System Settings; you need to go to the folders that contain them. As I mentioned above, these are the /ColorSync/Profiles folders in the Library folders at the top level of your drive and in your user folder. If you have multiple profiles for your Mac, or even for an older Mac you no longer have, you’ll find them in the Displays folder. The Created date shows when you set it up; if it’s older than your current Mac, or its display, move it to the trash.
Apple has updated the ColorSync Utility app in macOS Ventura to provide a lot more information. This new tool provides more information than most people need, but if you’re a professional working with photos, videos, or prepress, it can be useful.
How to Calibrate Your Mac
macOS includes an excellent tool for calibrating your Mac’s display. To access this, start by checking that Night Shift is not on; click the Night Shift button in the Display settings to check. On the Display tab of these settings, uncheck True Tone, if it is available on your Mac. This adjusts the color during the day, according to the ambient light around the Mac. If you plan to do any photo or video editing, and you’re concerned about the fidelity of the colors you see on your display, it’s a good idea to turn this option off when doing those tasks.
Click the Color Profile menu and choose Customize, then click + at the bottom of the window. The Display Calibrator Assistant opens and walks you through the process. If you press the Option key when clicking +, the calibration tool opens with more options; if you’re going to do this, you might as well use all available adjustments.
When the assistant launches, you’ll notice that your display’s colors change a bit to the default settings. Click Continue.

Every display panel is slightly different, and your lighting is different, so the next screen tells you how to set the contrast and brightness. If you have a Mac with a built-in display, you won’t have a contrast setting. Set the brightness to the level that is comfortable. Click Continue.
The next screen helps determine the display’s native lighting response. You’ll find two sliders and a square in the center of the screen. Follow the instructions and move the sliders until you cannot distinguish the Apple logo from the background. Do this slowly, and take your time, because it’s a subtle change. When you’ve finished this, click Continue.
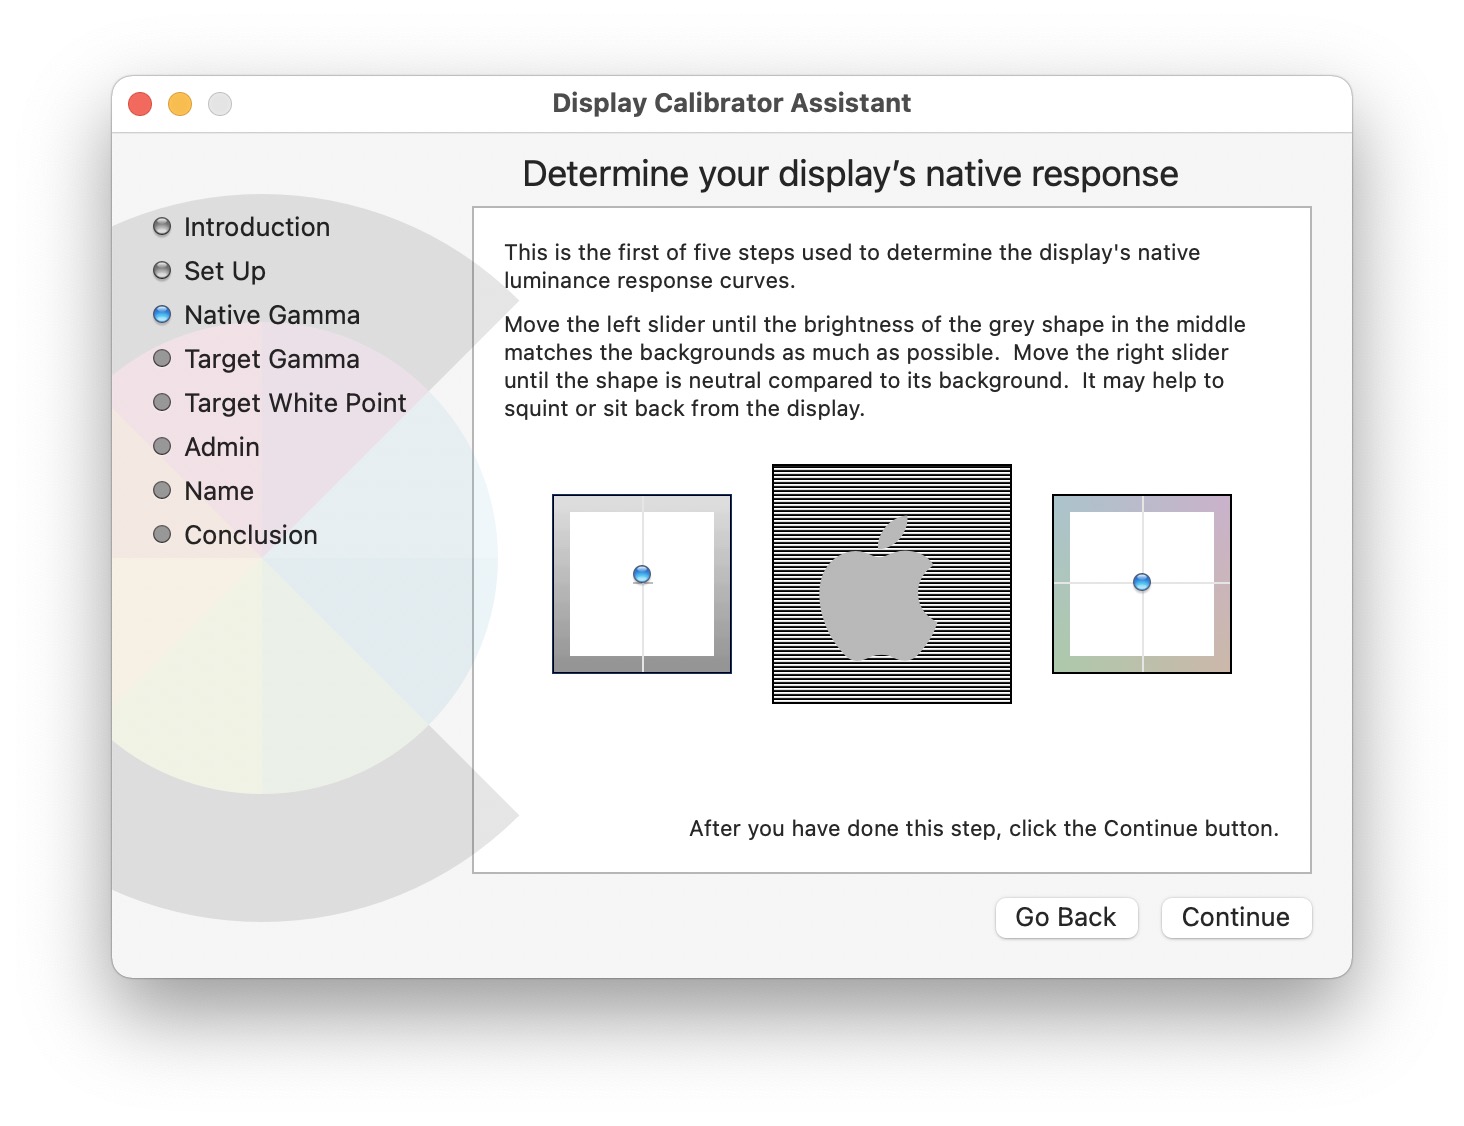
You will see a number of screens like the ones above, each asking you to move the sliders until the Apple logo blends into the background. They all act on different colors. Click Continue after you’ve completed each task.
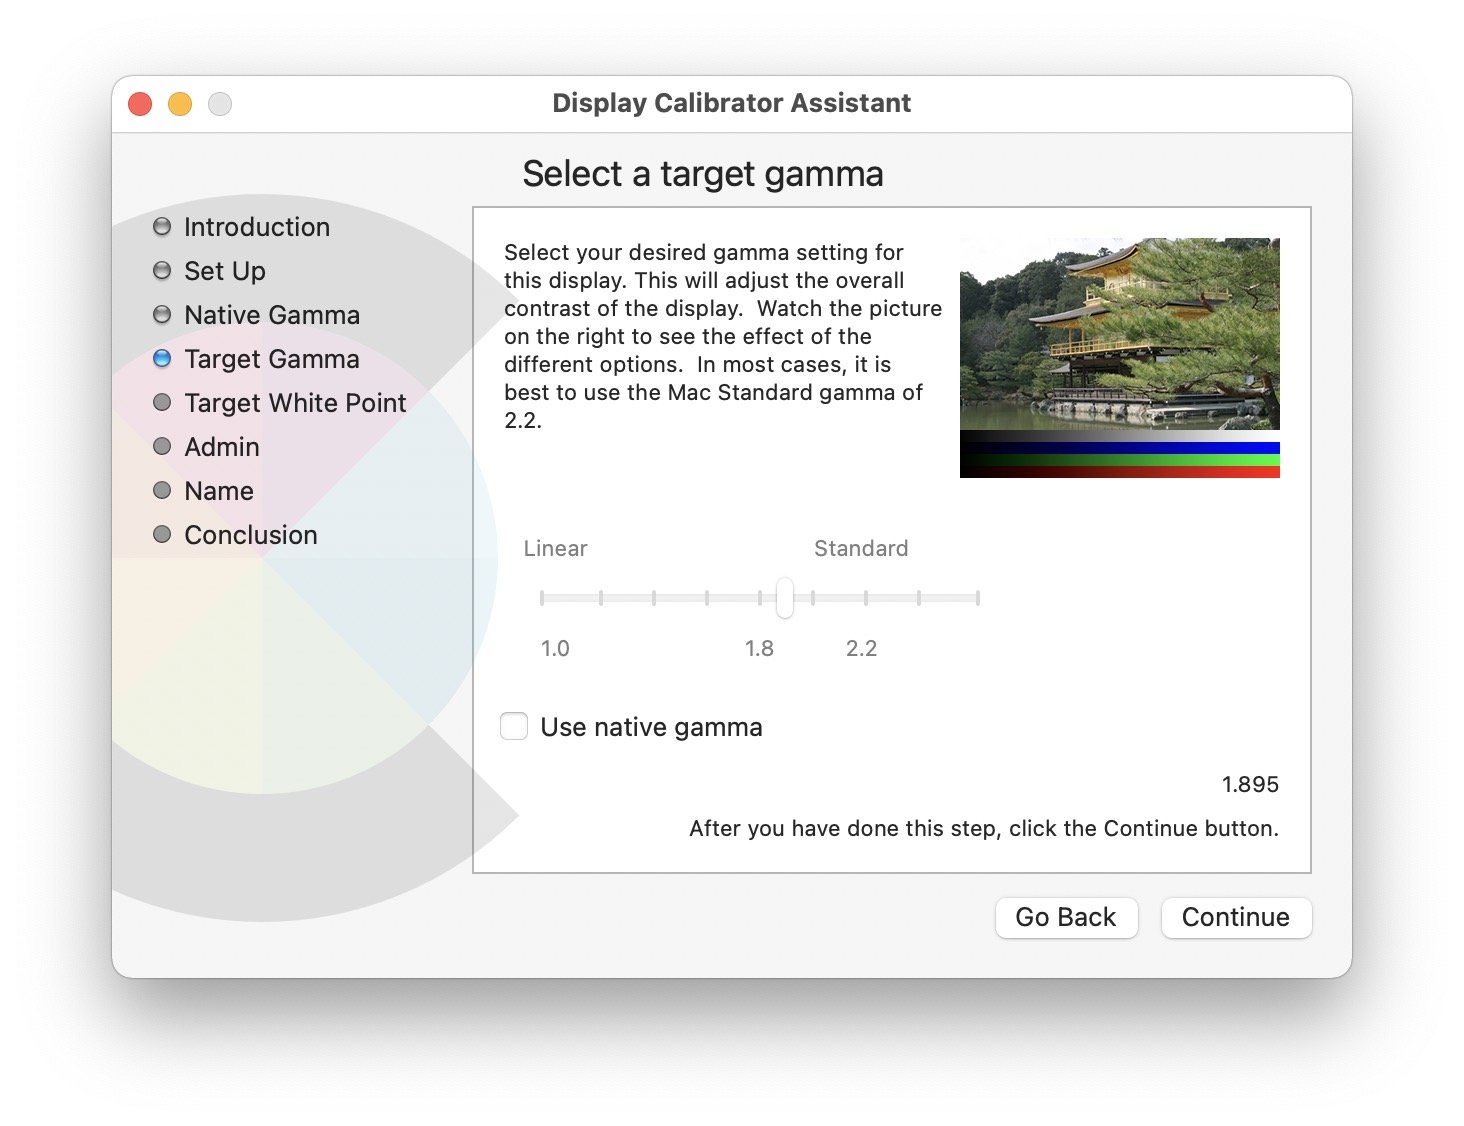
You then see a "Select a target gamma" screen. (Gamma is the contrast of the display.) You can check Use native gamma, or adjust the slider to what looks right to you. Apple suggests a gamma setting of 2.2, so try this, and see if you like it. Click Continue.
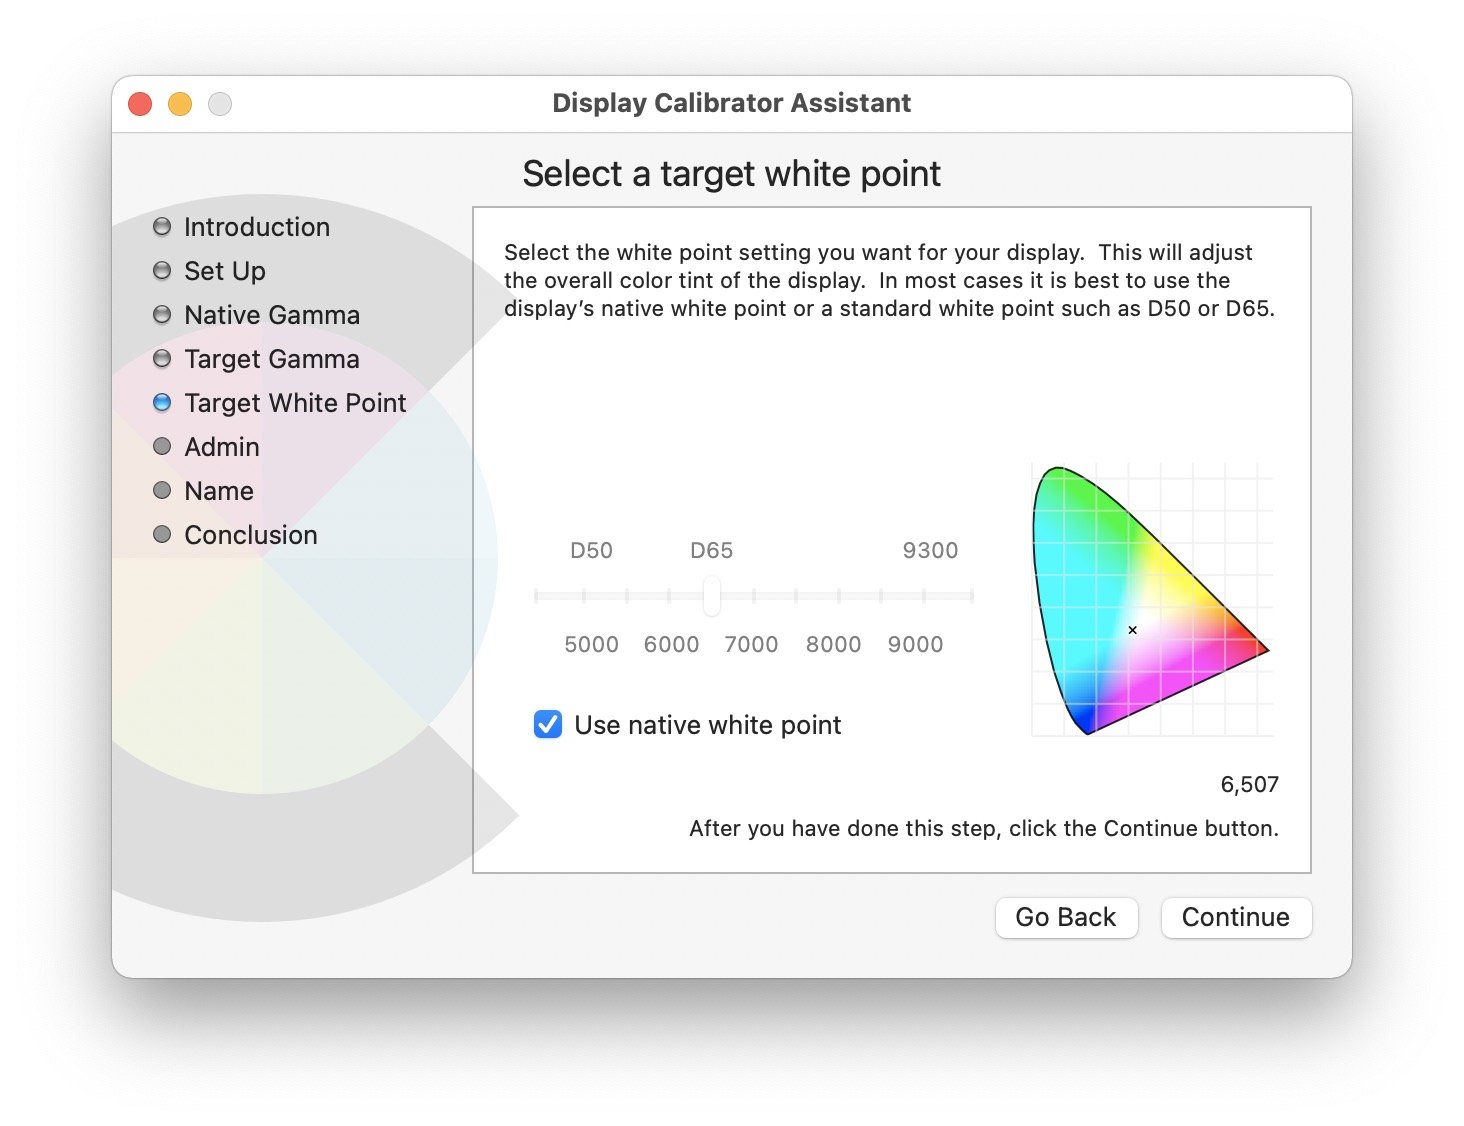
The next screen offers to set a target white point. The only time you’d want to change this is if you have professional needs and know exactly what white point you need to use. Leave "Use native white point" checked, then click Continue.
You are next asked if you want to allow other users to use your calibration. If you’re the only user on the Mac, this doesn’t matter, but if you share your computer, it’s a good idea to check this so other users will benefit from your calibrated colors. Click Continue.
You can then name the profile and save it. By default, this will be something like iMac Calibrated, but you can name it with anything you like, such as a date. Click Continue.
The conclusion screen shows the details of the calibration. Take note of any information you might need, and then click Done.
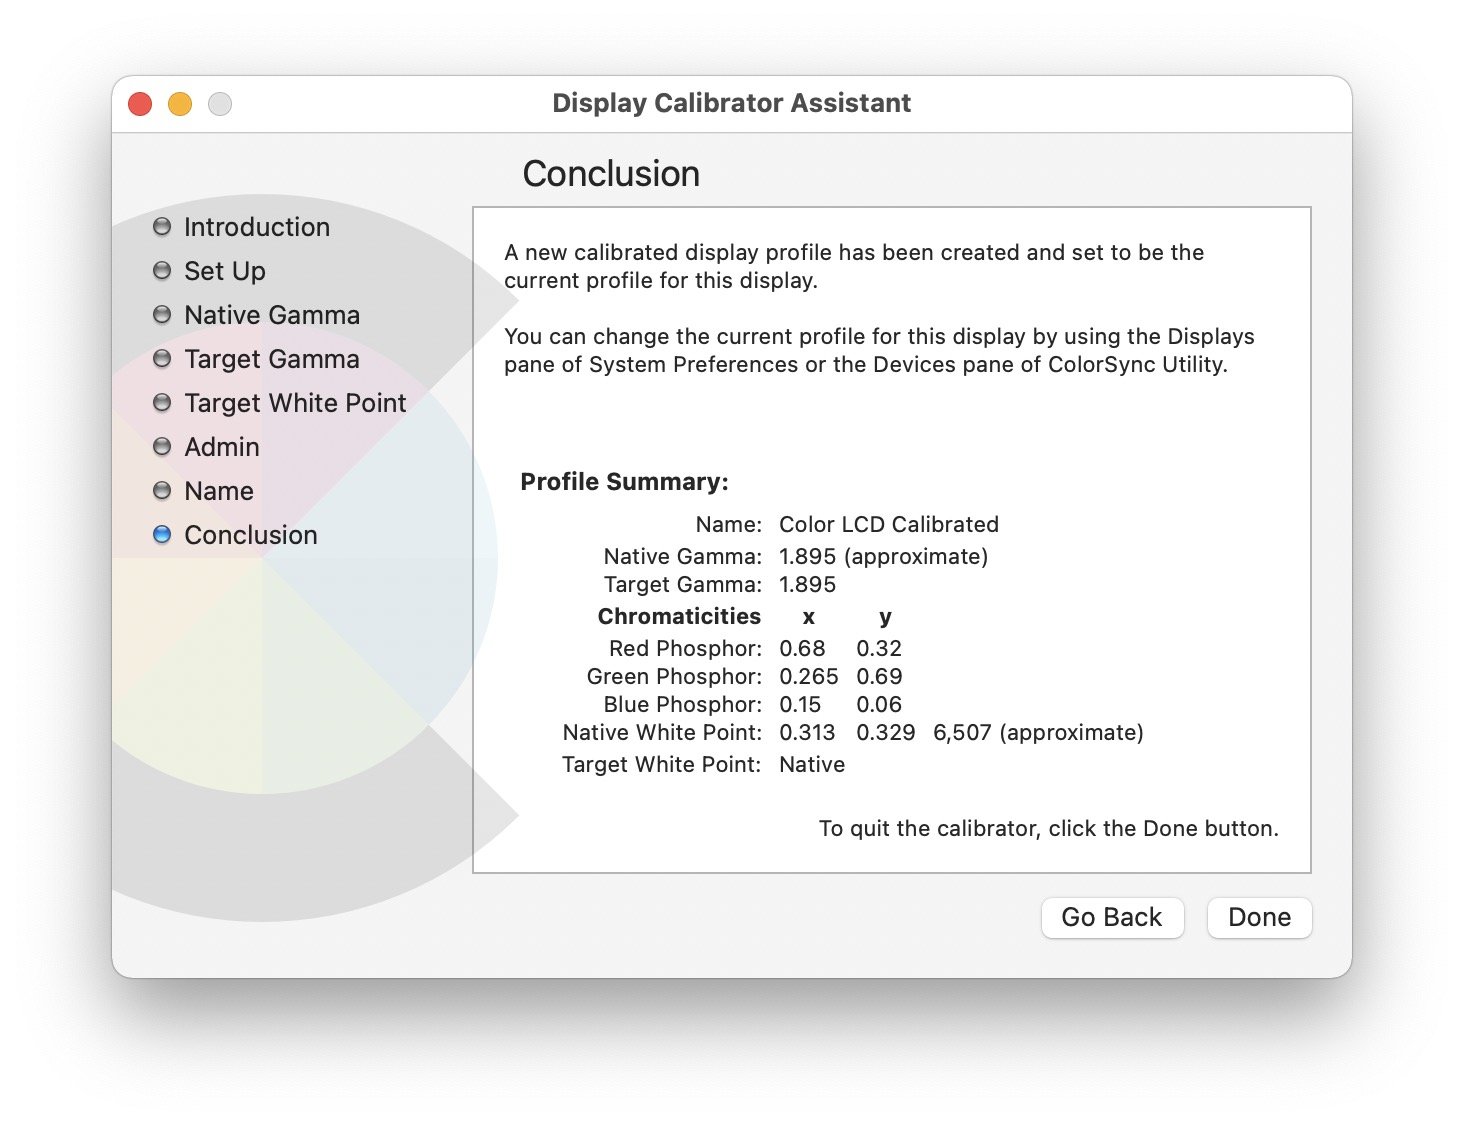
It’s now worth clicking the profile you were using previously, and then clicking the new one to see the difference. One thing you may notice is that the default profile looks wrong to you; this could be due to the way you see colors and contrast or because of your lighting. What counts is that you are comfortable with the color profile. If you don’t like the new profile, you can switch back, or go through the calibration process again, paying closer attention to the Apple logo against the background.
About True Tone
Apple’s True Tone technology is designed to “make colors appear consistent in different ambient lighting conditions.” It works on Macs and [a handful of external displays](https://support.apple.com/HT208909). Apple also offers this on some iPhone and iPad models.
True Tone is designed for comfort, but it’s not a tool you should use if you’re doing any work where colors matter. It alters the white balance, which is the tint of pure white. White balance is used in photography and videography to ensure that colors are true; you can shoot a photo of a special white card to then, in your photo or video editing app, set the white balance according to the tint of the card in your photo.
Open a blank document in any word processor, then switch True Tone on and off to see how it changes the white balance. This change may make it easier to work with text and websites, but it will alter all the colors you see when editing photos. If you open the Photos app and view your photo library, you can see how this matters. Switch True Tone on and off, and, depending on the time of day and ambient lighting, the difference will be obvious.
Hardware Color Calibration
The above calibration process is great for most Mac users, but if you work with photos or videos, or if you want to print your own photos and have the colors of your prints match your display, then you need a color calibrator. This is a device that hangs in front of your display and detects colors that the device’s software displays.
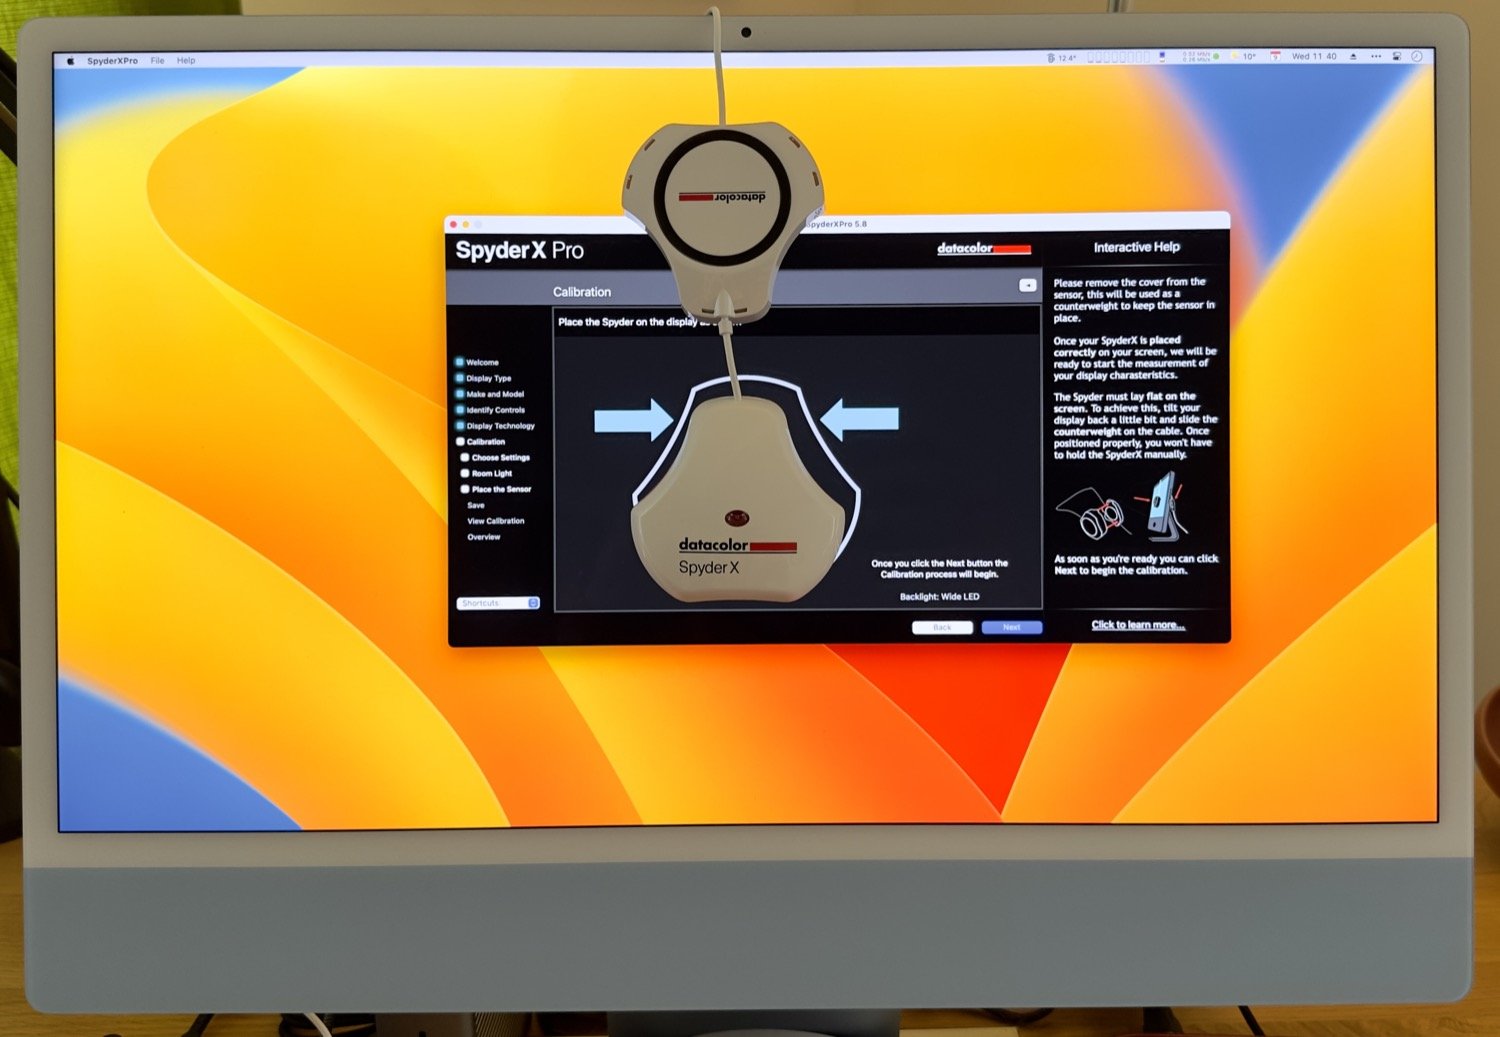
This process takes several minutes, and, at the end, the software creates a detailed color profile that is set to "an industry color reference standard." I use the SpyderX Pro, which allows me to accurately calibrate both my iMac and my laptop, so their colors match.
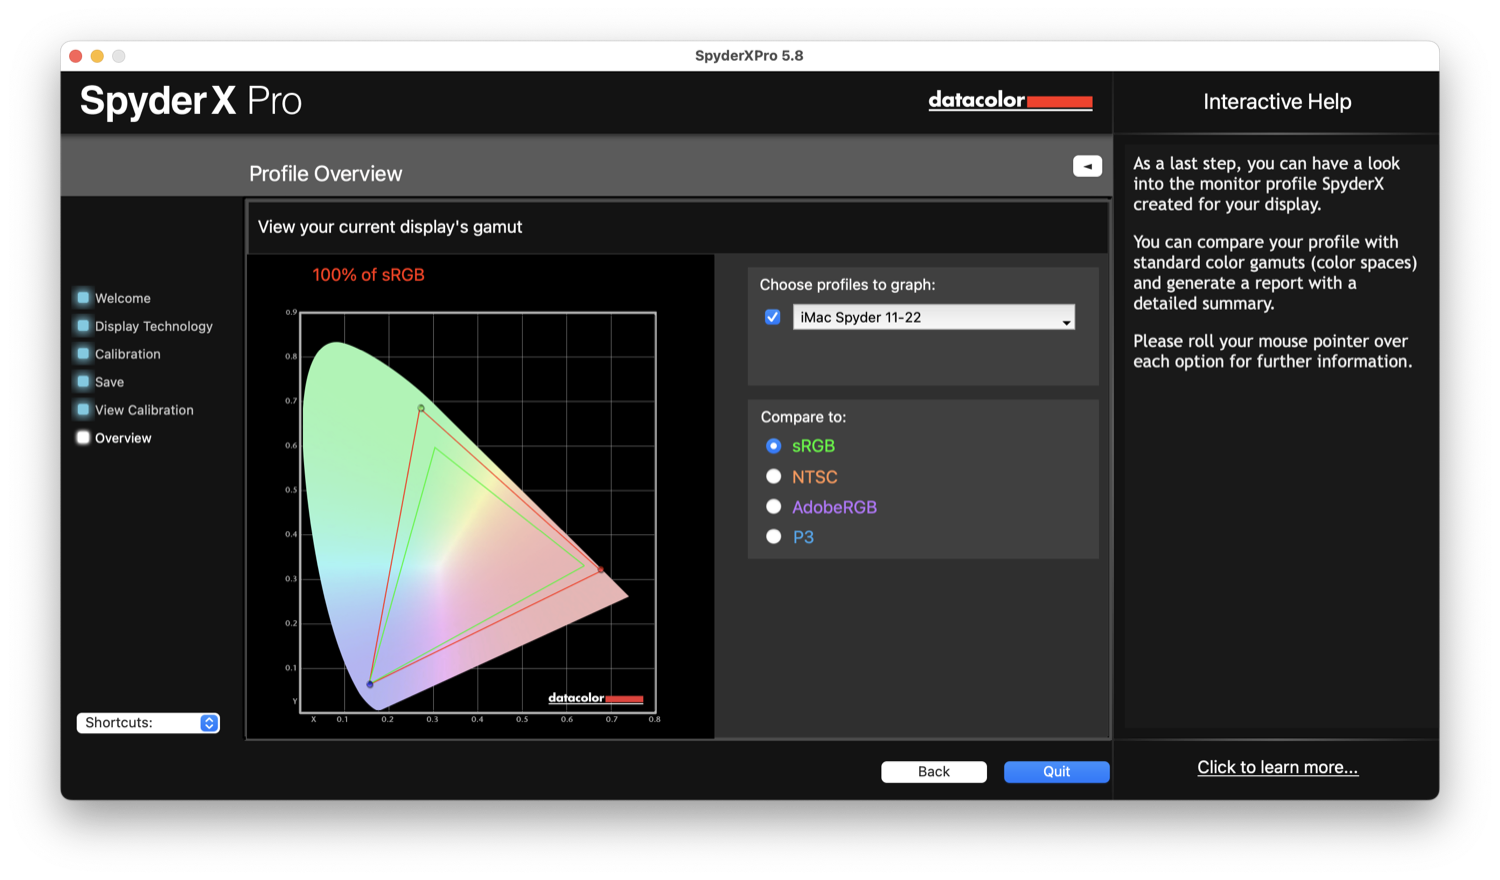
If you use a device like this, you’ll notice that it probably sets the colors a bit differently from how you would do so using Apple’s calibration assistant; this is because it detects the actual colors the display shows. It can also factor in ambient lighting, and some of these devices can stay plugged into your Mac to alter the color profile as the lighting around you changes. This can be useful if you have a lot of natural light, since the color temperature changes during the day, or when the weather changes. Because of this, some photographers use monitors with hoods on the top and the sides of the display so ambient light doesn’t affect the colors as much.
Whether you use Apple’s simple solution or a hardware device, you should consider calibrating your display. You may find that the colors look better, and if you do work with photos or videos, you see the exact colors in those media. It’s easy to do, and it can make your computing more comfortable.
How can I learn more?
 Each week on the Intego Mac Podcast, Intego’s Mac security experts discuss the latest Apple news, security and privacy stories, and offer practical advice on getting the most out of your Apple devices. Be sure to follow the podcast to make sure you don’t miss any episodes.
You can also subscribe to our e-mail newsletter and keep an eye here on Mac Security Blog for the latest Apple security and privacy news. And don’t forget to follow Intego on your favorite social media channels: Facebook, Instagram, Twitter, and YouTube.